Click here to visit ...

Monday, August 31, 2009

Taking Great Photos. Part 1: Setting Goals


We frequently get emails asking about our photographs. "How you do you get such great pictures." Or, more to the point, "How can I take great pictures?" Is it a special camera? Is it special equipment? What is the key?

Well, you too can take great photos. It's not a special camera, although it does require learning a couple of things about your own camera. And yes - there are some specialized pieces of equipment, that if you understand what they do - you can make your own if you are on a tight budget.

First - let's talk about what defines a great photograph - just so we're all on the same page. We could easily get distracted, or I could anyway!, and ramble off about Ansel Adams and Annie Leibovitz and not ever get back to the point.

You may be taking photos to record your beadwork - in which case, you have a goal - which is to take pictures that remind you of what you made.

Or, you might be taking pictures for a website because you are aiming to sell your work.

Or, you might be taking pictures to illustrate a tutorial, so that you can teach others about your techniques.

Or, you might be taking pictures to impress a jury to get into a show.

If you think up some other goals - let me know in the comments. ;-)

I don't personally see that shooting pictures for a jury is anything other than a specialized selling job - so I'm going to lump those in with selling, and say that there are three potential goals:

  • record
  • sell
  • teach

Teaching and recording are pretty similar too - it's a matter of assumptions about what the target audience knows - but for now - I'll leave them as separate.

So here's your homework for the week. I want you to think about exactly what you want your pictures to do. Record, Sell, or Teach.

Then think about who you want the pictures to record, sell, or teach to. You'll find that recording and teaching will be relatively simply - and "sell" will open up a can of worms that you might not get the worms back into. But give it a shot anyway. Who is your target audience? Who are you selling to. And "everyone" is not a valid answer. ;-)

You could also spend some time having a quick browse around the internet and try and find some examples of pics that you really wish you took. Bookmark them, print them, whatever. You could post links to them here in the comments so we can all see them. ;-)

Cheers - see you next week.

Sunday, August 30, 2009

Moggit: I Can Has Cheezburger meets Candice Olsen

Not jewelry-related, but it is about design - weeeeird design. Strange Design, funky design. The gals at www.moggit.com take potshots at designers - some justified - some, not so much. Anyhoo - they stuff they find is strange indeed! Check it out.

Saturday, August 29, 2009

Friday, August 28, 2009

Super Sneak Peek

Not to be confused of course with Dwyn's Saturday sneak peaks. I'm not sure when these will show up on the site, or the floor - but we have some very exciting new tools coming soon.

Think fabulous new tools from Lindstrom, and lortone tumblers, and...

I got a peek into the boxes Marg just brought in, and I'm very, very excited.

Also, I got an email from a friend of mine this morning. If you are in the Toronto area, and you LOVE hostas - you'll want to check this out.

Hi Everyone, I am letting you know about a super hosta plant sale this Sat
and Sun for a friend of mine. The prices are the best, as low as $3.00, you
will ever get and there are hostas you will not get at your every day garden
center. I am doing my friend a favour. I am at 57 Garden Street in Whitby.
I also have big Rose of Sharon trees in pink, blue and white. Thank-you for
reading and please pass the word. This is well worth the drive if you are
far away. Barb

Woohoo...I'm going to be there bright and early on Saturday :-)

Thursday, August 27, 2009

Class topic question

I have a question for you all today. We are working on designing a basic silversmithing class for beaders. We'll be covering using both sterling, and fine silver. It will incorporate basic soldering, and fusing - Using 'low tech' equipment. (equipment that can be picked up for less than $100 - rather than $1000) Making various types of headpins, and soldering jump rings are an obvious addition.

As a beader, Is there any particular technique you would love to see added into this class? What would help you set your work apart? We want to design this class so that it's the most benefit, and useful to you. Let us know!

Wednesday, August 26, 2009

Bronze Firing Success!

Finally! Whew, that was getting really frustrating. Turns out, the problem was my kiln. This was the same kiln that I use to fire my art clay silver with no problems. However, the bronze is more finicky.


This time, I tested it out using a firefly kiln, and I ramped up 300 f per hour to 1500 f - then held for 2 hours. After which, I just shut the kiln off. The firefly I'm testing right now does not have a digital controller, just a pyrometer - Which means, you can't program it - and all changes in temperature need to be done manually, over the course of 7 hours. A digital controller is really, really needed. 7 hours babysitting a kiln is not by any stretch of the imagination fun. But I did get my studio cleaned up and organized!

The pieces came out wonderfully - perfectly fired, and sintered. Nice solid pieces of bronze!

Here are a few little worry beads I made -


I did have one failure in the batch, but it wasn't a problem with the firing, but rather with my construction. I think I mentioned before that there is a learning curve to working with the bronze - especially if you are accustomed to working with the silver clays. The construction techniques that work in silver - do not necessarily work in bronze.

Below is a hollow heart box bead that made. The box is built in three stages. Before firing, the seam was not at all visible. Obviously, my seam construction was not solid enough. I'm going to try this again being more careful - we'll see what happens.


I'm anxious to try out the copper clay now as well. My copper arrived in my mail box this morning - so by next week I should have some copper to show you!

Tuesday, August 25, 2009

Multi Week Classes Continued...

October brings us more multi-week and multi-part classes. We start off with Heather's Art Clay Level One Certification Course beginning Friday Oct 2nd through to Monday October 5th. This class will include the completion of 9 specific projects that will cover a variety of techniques and types of Art Clay. Projects include making flat and round shank rings, use of syringe clay, creating a mirror finish, a brooch, pendants and much more. Upon successful completion of the certification students will be entitled to a 35% discount on Art Clay Silver. This is a specialized course for people interested in learning and demonstrating proficiency in the use of Art Clay Silver. Students should have a lot of experience with metal clay.


Heather is also offering a Metal Clay Ring class. Learn to make metal clay rings in this 2 session, 6 hour class. Learn a variety of ways to make rings using precious metal clay. In this class you will learn how to make a band ring and a wrap ring, as well as, interesting ways to embellish your rings. Dates for this class are Thursday October 8th from 6 to 9pm and Thursday October 15th. This is an intermediate level class.


Robert Burton's Wire Working and Wrapping 101 begins again on Monday October 19th from 6 to 9pm. This class runs for three weeks. This is a beginner class that will cover the basics of wire working and wrapping. Time permitting students will make a ring, two pendants, a bracelet and earrings.


We are extremely excited that Michael David Sturlin will be here from October 22nd to the 25th! He will be offering two classes.

Michael's first class is the Hand Crochet Chain. A hand-crocheted chain is one of the most supple, beautiful, and unique of all the metal chains which a jewelry artist can produce. Participants will learn to fabricate Mr. Sturlin’s signature style, award winning, hand crochet technique. Each student will use a needle and fine silver wire to produce a supple and elegant bracelet or necklace chain, ready for a clasp. This is a two day class,Thursday October 22nd and Friday October 23rd from 10 to 6pm each day. This class is suitable for all levels.


Saturday October 24th and Sunday October 25th Michael is offering a Quick Clasps and Findings Workshop. This class provides an introduction to the basic tools and techniques for making finely finished components directly in metal. Utilizing skills of forging, forming, bending, shaping, filing, sawing, and piercing, students construct samples of clasps, bails, findings, links, attachments and connectors in copper and fine silver. Instruction includes tips on practicality of design, functionality, making multiples, developing and refining the production process, along with useful information on studio organization and bench tips from a master goldsmith. This class is a beginner plus/intermediate level class. Some understanding of basic metal smithing is suggested.


Can you believe that the summer is almost over? We have a couple more classes on before the Labour Day weekend and the official end of summer.

Pam Kearn's new class, I've Learned Peyote...Now What is on Thursday August 27th from 6:30 to 9:00pm.


Saturday August 29th is Getting Hitched...Making Metal Clasps with Heather Bell-Denison.


Sunday August 30th is Metal Clay Fusion with Heather Bell-Denison.


Thursday September 3rd is How to Have a Successful Craft Show with Catherine Winter from 6 to 9:15pm.


Don't forget we have Happy Hour Torching on Thursday from 5 to 9pm. Dwyn will be here as usual. Don't forget to reserve your torch.

Happy Beading!

Monday, August 24, 2009

Further Thoughts on Wiring a Briolette


Last week, I showed you how to wire up a briolette or pear drop for hanging.

Then someone asked about wrapping the wire down around the bead for a sort of bead cap look.

Ok - we can do that.


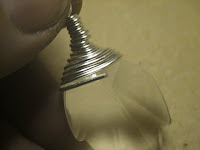
One approach is to use a thinner wire, 22 gauge or less, and just go crazy - use a long piece of wire and wrap down and over the bead, and then even back up to the loop again and finish there. It gives you a funky and highly textured look - which may work well in the context of what you are making. See the green leaf vs the clear leaf in the first picture. (BTW - it looks pretty cool with square wire too.)

But if you'd like to attempt to make that a little neater and more controlled - try this method.

Slide the bead onto the wire and fold the wire up into a tight U shape. I'm using 20 gauge wire here. I cut about 8 inches, and I used pretty much all of it.


You want the wires to lay flat, side by side. If the wire is very soft, you can just do this with your fingers, otherwise, use pliers to get them lined up.


Holding the wire with the round nose pliers, and leaving the short tail in place, start a wrapped loop.

See a recap of wrapped loops here, and a video here.


Bend the long end of the wire at a 90 degree angle.


Reposition the pliers.


Wrap the wire around the pliers.


The short tail should still be sticking up through the loop. Don't cut it off. Yet.


Start wrapping your wire down towards the bead.


Make sure each successive wrap lays neatly and tightly next to the previous one.

You will see that you are wrapping onto a triangular base, as opposed to a straight line - that tapers all the way down to the bead.


This will give you a nicer taper, as opposed to wrapping down a straight pole and then trying to flare out around the bead.


When you get to the bead, simply continue to wrap, wrapping down onto the bead.

Continue to ensure the wraps lay neatly next to each other.


I usually carry on until I run out of wire. The best place to end is in the middle of one of the flat sides - which gives you the best chance to have the wire lay down flat and out of the way.


In this case - the end of the wire was too close to the side,


so I trimmed it off a little.


To keep it flat - squeeze the wire down against the bead using your pliers, squeezing on each side of the bead. Do not press too hard on the bead - especially the crystal beads, as you may crack them - but you will be putting some pressure on the bead and using it to form the wire.


If you are using a fine (thin) wire - you may find the end just naturally slides up and under the coil, but this wire is too thick for that to happen.


For your final step - go in and trim out that wire tail out from the loop. Use sharp flush cutters and trim carefully so as not to cut the loop.


The end result is fairly tidy and neat looking.

Cheers!

Sunday, August 23, 2009

Eye Candy: Shopping for a new phone

Then you absolutely MUST check out this blingly little baby - at a measly $310,000 - you should pick up one for your S.O. too!

Cobra phone by Boucheron.

:-P

Saturday, August 22, 2009

Sneak Peek at Next Week

s20436 Stringing - 6 mm Wire Lace Ribbon - Brass (yard)
s21253 Sterling Wire - .8 mm Square - Half Hard (foot)More Wire Lace (the wide stuff this time) and Square Sterling Wire! Wire we doing this? Why- er - not! ;-)

Friday, August 21, 2009

Handcrafted Jewelry Magazine


Those who know me, are aware that I take immense delight in all things 'crafty' I'm not a snob when it comes to jewelry. Yes, I know silversmithing, I can fuse, solder, set a gem, make glass beads on a torch, rivet, and all sorts of other more traditional jewelry techniques. However, I equally love playing with paper, and resin, stamping, and glue!

This magazine is just totally up my ally. It's a special issue from beadwork magazine, and it features a really great article on using resins, and resin like materials including diamond glaze.

Lots of neat mixed media projects using fabric, paper, metal, polymer clay, buttons - you name it.

Get your copy here!

Thursday, August 20, 2009

Mad Hatters Tea Pot

I know, nothing beady about this at all - but Ohhh, If only I could afford this. I'd be drinking tea 24 hours a day.


Be sure to check out all of her other fabulous ceramics. And hey, if you were afraid of colour, her work should give you some fabulous inspiration for your next beady project!

Wednesday, August 19, 2009

Swarovski Ambassador Program


We are so, so excited and proud of Stephanie Dixon! Stephanie, whom some of you know as our crochet instructor, and others know as one of our celebrity inspiration designers has just been accepted as a Create your Style Ambassador! This is a very elite group, with only 34 ambassadors world wide.

See below and check out the link for more details.

Congratulations Stephanie!

The CREATE YOUR STYLE with CRYSTALLIZED™ - Swarovski Elements Ambassador Program refers to a very exclusive network of well-known experts in the field of DIY, who have a strong passion for CREATE YOUR STYLE with CRYSTALLIZED™ - Swarovski Elements, a high level of design expertise as well as a strong record in giving workshops.

The CREATE YOUR STYLE Ambassadors will share their expert knowledge about application possibilities, techniques and design ideas during workshops as well as on the CREATE YOUR STYLE Sparkling Community. Moreover, they will regularly publish blog articles on various topics which you will be able to comment and share with other design aficionados.

Check out the page here!

Tuesday, August 18, 2009

A Look at the Fall

This fall we have a lot of different types of classes scheduled. Everything from lampworking, to bead stringing and stitching and even metal smithing! Many of these classes are single day classes, but we are also offering a lot of multi-part classes. We have four multi-part classes beginning in September.

Robert Burton's Wire Working and Wrapping 101 begins on Monday September 14th from 6-9pm. This class is a beginner class and runs for 3 weeks.


Cindy Vroom is offering a 4 week bead stitching course, Basic Bead Stitching 101 Continued. This class picks up where the 101 left off. It begins on Thursday September 10th, from 6:30-8:30pm. It will focus on a different stitch each week; Peyote/Brick Stitch combined, Russian Corralling Technique, Dutch Spiral and St Petersburg Chain. Students do not need to take all four, sign up for the classes you want. Students registering for all four classes will receive the discounted rate of $100.00. These are beginner classes.


Suzanne Crudden is back on September 16th from 6 to 9pm with an 8 week Metal Smithing 101 course. This is an introduction to Metal Smithing, focusing on cutting, filing, piercing, soldering, polishing, and using a variety of hand and rotary tools. Students will begin using copper and will move onto a silver band ring by the end of the class. This is a beginner class, no experience required. There are only 4 spaces left for this course!


Dwyn Tomlinson will be offering a 4 week Introduction to Lampworking 101 Part 1(Glass Bead Making), beginning on Tuesday September 29th from 7-9:30pm. This is a beginner class and will focus on the basic round bead, dots and bumps, stringers, twisties and controlling the glass. No experience required. This class is ideal for those who have no lampworking experience or those who have taken an introductory course and want to learn more. Part 2 of this class will begin on Tuesday November 3rd. A discounted rate of $480.00 will be given to students who register for both Part 1 and 2 prior to September 29th (individually the registration fee is $260.00/course).


We also have a few great classes coming up this month. This weekend we have 2 classes with Stephanie Dixon, Turquoise Lustre Blooms on Saturday August 22nd from 10 to 1pm.


From 2 to 5pm she is offering her Crochet Cuff Bracelet.


Amy Waldman-Smith has a 2 day 8 hour Introduction to Making Glass Beads class on August 22nd and 23rd. This is an introductory class, there is no prerequisite.


Heather Bell Denison has a number of classes coming up this month. Sunday August 23rd is Charmed I'm Sure from 10 to 5pm.


Saturday August 29th is Getting Hitched...Metal Clay Clasps from 10 to 5pm. This is an intermediate level class, students should have taken an introductory course and have experience with metal clay.


Metal Clay Fusion on Sunday August 30th from 10 to 5pm. This is a chain making class; it is an intermediate level class so students should have taken an introductory course and have experience with metal clay.


On Thursday August 27th is Pam Kearns new class from 6:30 to 9pm, I've Learned Peyote...Now What? Students should have experience with even count peyote stitch.


Don't forget about Happy Hour Torching from 5 to 9pm, buy one hour get one free. Dwyn will be around as usual and do not forget to book your torch in advance.

Happy Beading!