Click here to visit ...

Thursday, September 30, 2010

Copper Pipe Pendants


A while back I picked up a book by Stephanie Lee called Semi-precious salvage. I just love her designs, as I'm quite enamored with the vintage-y, rough, dug out of the dirt look. Mixed media jewellery is quite intriguing to me - and I plan to explore it more over the next little while. I'm really just scratching the surface.

In Stephanie Lee's book, she used copper pipes and copper sheet to create bezels, she further roughens up the look by covering the whole thing in solder. I was excited to see if I could take the little resin/glass pendants that are so popular, and kick it up a notch.  Of course, having an open back allows you to create a double sided pendant!  The process is crazy time consuming, but as I've discovered - If you make a whole bunch at a time, it's not so bad :-)

First step is to cut the tubing into little slices - for this, you'll need a tube cutter from the hardware store. You could use a jewelers saw, but that would take even longer!

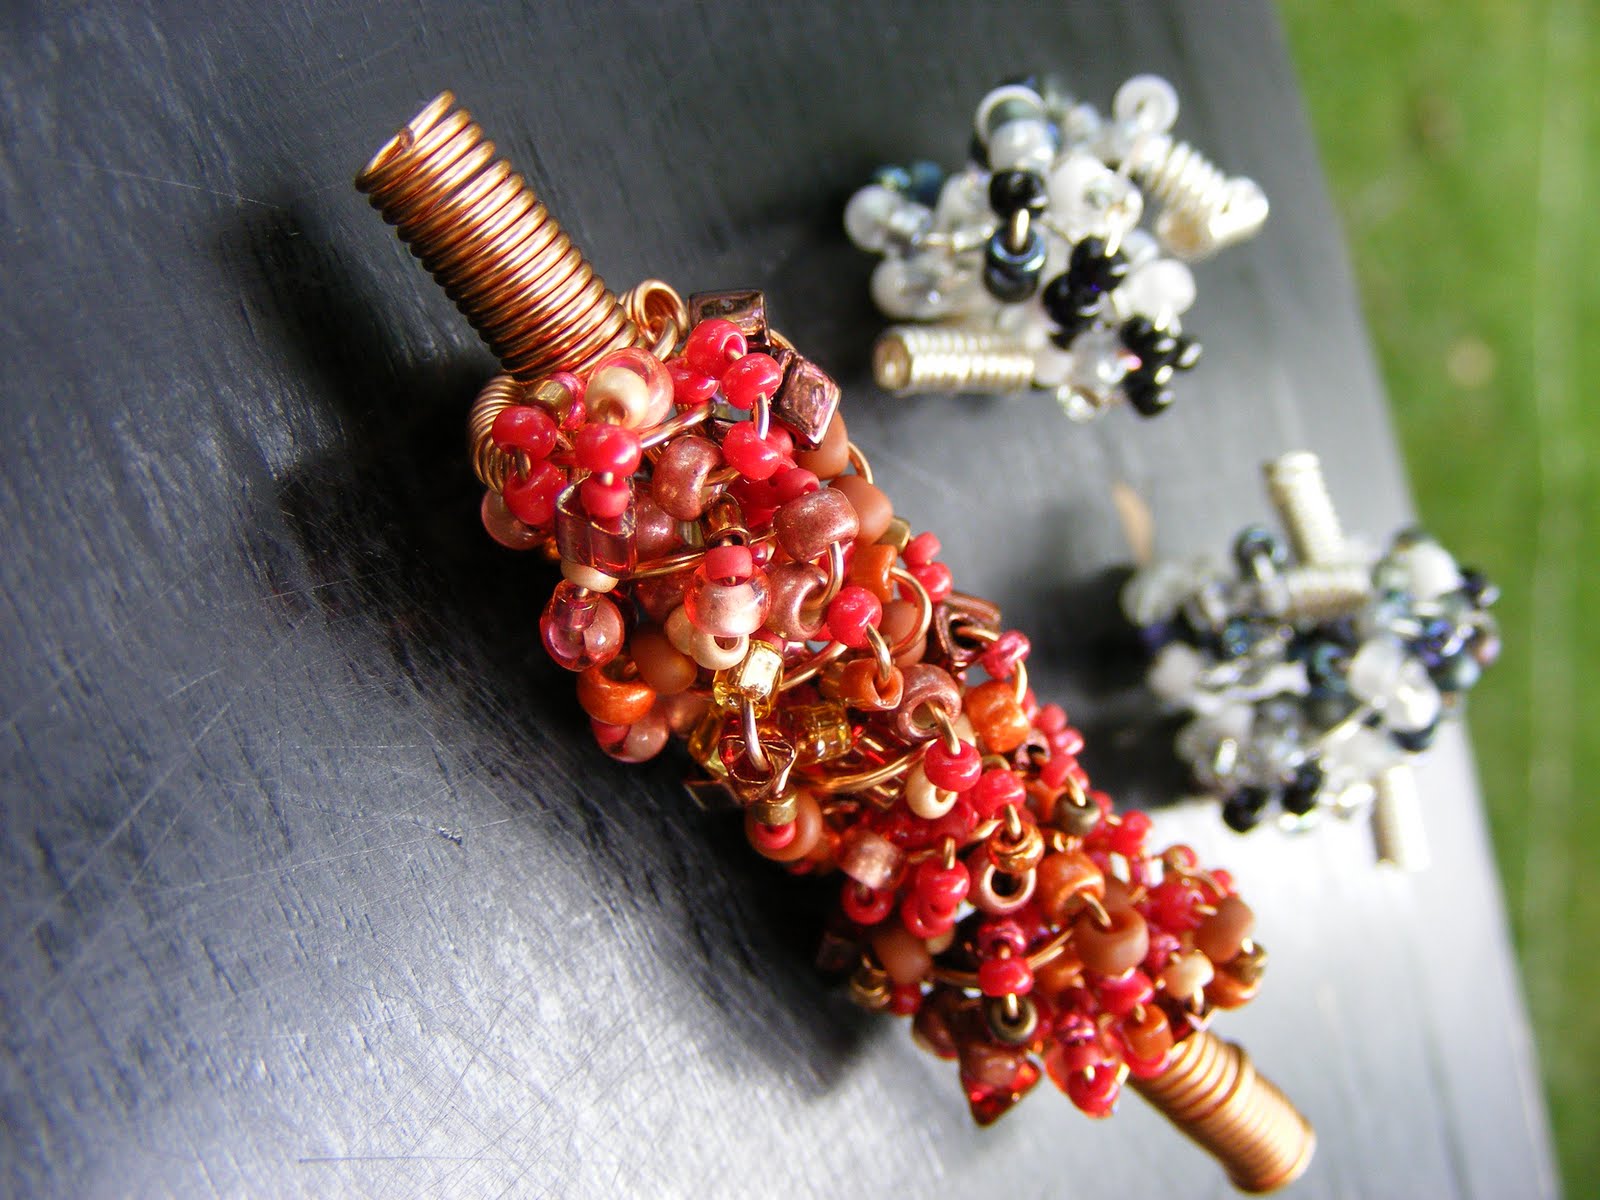
I then used our handy hole punch pliers to create 2 holes on opposite sides.  A handmade balled copper headpin was inserted, and wired up into a wrapped loop.


To create a flat surface to stick my paper on, I used some transparent polymer clay, and then baked it in place. I suppose you don't really need to bake it, since you're encasing the whole thing in resin - but I did, as I felt I should for some reason...

Once my images were in place, I then filled each side with resin, letting each side dry for 2 days before filling the other side.

Once the pendants were fully cured, I used some renaissance wax to seal the copper to help prevent tarnishing.

Wednesday, September 29, 2010

Halloween Create Your Style Inspiration

I just had a peek at the Create Your Style website by Swarovski.   If you're looking for some sparkling Halloween projects - go have a peek.

Tuesday, September 28, 2010

MICHAEL DAVID STURLIN AT BEADFX

If you've been considering taking one or both of Michael David's Sturlin's classes, and have not signed up yet, this might be the time. Classes are almost full!!! Both classes promise to be of full of hammering and sawing goodness - and of course beautiful hand-made jewellery.

And if metalsmithing is not for you, check out our other classes - fancy some bead crocheting?

Adios Amigas!

Monday, September 27, 2010

One-off Free-form Cabochons

Got another batch of one-of-a-kind, free-form cabochons in the store. These won't be going up on the website - you're just going to have to come into the store to get them. Such a hardship, I know. Spending time in a light, airy store surrounded by all the beads and tools and findings. Getting all sorts of ideas for all kinds of other things you can make. Maybe even striking up a conversation with someone who actually appreciates a good bead the way you do. Tragic. Make a day of it. ;-)

Here's some selected cabs as eye candy.


Obviously - this next one is Picture Jasper - with this view of the mountains - it's easy to see how the stone gets it's name!


Looks like Imperial Jasper - those silky peach and tan tones.


Can you not just see the geological forces at work - creating these stones? Like little polished slices of history!

This almost looks like a slice of bone or a branch of an ancient tree!


This could be an impressionist painting of a vineyard, about to be decimated on the slopes of Mt. Vesuvius.
Definitely looks wood-like!


There is something heart-breaking about this piece - irregular pillars of crystal - thrusting up - over a torn landscape.

This - THIS - looks for all the world like a - guitar pick.


The cherry blossom festival, no?


As for what to do with them - you can go as simple as gluing a bail on the back, like last week's post, to elaborate beaded bezels, or even traditional silversmithing techniques. Wire wrapping too! Just cause it doesn't have a hole - doesn't mean you can't use it.

(Prices range from around 9.95 to 24.95 - depending on size and rarity of the stone.)

Saturday, September 25, 2010

The Joy of Metal Clay: Pearl Grey Steel - Trial # 1

As I mentioned several Sunday's ago, I tired creating with pearl gray steel clay. Sadly the pieces I made broke in transit....I finally decided to fire them to see whether I managed to at least sinter the clay properly.

Here is what I did:
I started with Pearl Grey Steel (Pearl Grey Steel Reference) mixed with Quick Fire Copper.
I placed it in a steel pan with carbon and fired it with a full ramp to 1000F then held it for one hour then ramped it 750/hour to 1800F and held it for one hour.

Sadly, I had failure (or partial failure, partial success). Several pieces did appear to fire correctly but I found that the pieces on the edges of my box did not sinter properly and I was able to break them in half...Oh how frustrating. Upon further inspection I realized that the pieces were breaking in the area of the copper clay....I was able to separate the copper from the steel and discovered that the steel had sintered but the copper had not.

Sorry I don't have any pictures....(The camera is MIA - I have two boys who have developed a love for photography)

I am planning to order more steel clay and fire again, next time I won't get ahead of myself and combine the clays. I will admit there are some things I that may have caused the problems:


  1. I used a steel pan to fire the pieces in as opposed to Hadar's recommended Fiber Blanket Box (directions to build this are here). The reason why this could have caused a problem is that the Fiber Blanket Box, likely acts as an insulator and may keep the pieces just a little bit warmer and affecting the overall temperature (???).
  2. Another problem may have been my carbon as I hadn't fired with Carbon in a while and perhaps this was a bad batch.
  3. Finally the problem could have been the type of copper (obviously the copper that didn't properly). I do wonder whether the copper was not Quick Fire (there is a traditional type as well). The pieces were made at a friends house so I don't have the containers but I wonder if this was the problem.


Sadly, I have found no matter what type of base metal clay used the ability to get consistent results in firing to be frustrating and there are often few clear cut answers.

Overall, I am optimistic that the steel actually sintered properly the problem was with the copper. I will be ordering more steel and perhaps some white bronze and I will update you on what I find. (Plus I will add pictures)

As I have mentioned in the past Hadar's Blog is a wealth of information for base metal clays. Check it out, it is inspiring.

Heather

The Business Chat - Time to talk about the Holidays!

It's bright and sunny outside, the first few trees are starting to turn colour, and today I saw the season's first pumpkin display! Time to panic people, CHRISTMAS is coming!!! Only 3 more months until the day!!!

As most people don't leave gift buying until the day before the shopping season will begin in earnest in about 2 months. That means that if you intend to sell this season (and I assume you do as you're reading a business chat) then you need to start getting ready now. Today I'm posting a checklist for you to help kick your holiday sales season.

  1. Set yourself a holiday sales goal. How much do you think you will sell? Be it 10 items or $10,000 have a set goal to work towards. Post this goal somewhere you can see it everyday.
  2. Craft shows. Do you have any craft shows lined up? While it is late in the season to book into larger shows there are still loads of smaller venues that you can get into. Look for Calls For Entry at your local supply shops, newspapers, schools, or online. Most crafts have forum groups, try asking the members if they know of any shows.
  3. Booth display. If you're selling at a craft show you'll need a good display. Is your display lovely? Could it be better? Set it up in your living room and ask some friends to critic it. How's your signage? And your lighting? Does it stand out and scream "BUY ME!"
  4. Online sales. If you're selling online you'll have stiff competition for the holidays so start thinking how to make your shop stand out. Spiffy up your shop with holiday cheer like a holiday banner or offer a special holiday discount. Maybe something like free shipping for the month of November to encourage early shopping? (and because most people will offer it in December).
  5. Packaging. Look at your holiday goal and calculate how much packaging you need to sell that amount. Make sure you have enough in stock.
  6. Marketing materials. Business cards, postcards, flyers whatever you use make sure you have enough to last the season. Most of these items are cheaper online and you'll save money by using the cheapest and slowest shipping. This takes time.
  7. Return policy. The majority of your sales will be given as gifts. What if it's the wrong size? Or the recipient isn't thrilled? Can they exchange it? What is your return policy? If you're at a craft show print this up and have it by your cash area. If you're selling online put this in your shop policy section. Always anticipate questions before a customer asks them.
  8. Inventory. Again, look at your holiday goal. If your goal is a dollar amount calculate how many pieces that is. Tip: during the holiday season cheaper items sell more than expensive items. Take the number of pieces you expect to sell and double it, that's a good amount of inventory to have on hand.
  9. Supplies. From your inventory calculations make sure you have enough supplies on hand. While you may not want to invest in buying all the supplies in advance make sure that your supplier always has the items you need.
  10. TELL PEOPLE. You are putting a lot of work into your venture and you've created some fabulous things. Scream it from the rooftops that you are open for business NOW! Announce it on your facebook page with lots of pictures. Blog it. Send out newsletters about your craft shows and your online store. Carry your business card and hand it out when the bank teller comments on your earrings. Wear your jewelry to work and carry extra in your purse to sell at lunchtime. Letting people know you're ready for the season means they don't have to think as hard about what to buy. Santa is busy these days, do the elf work.

Friday, September 24, 2010

Inspiration Friday

Happy Friday everyone!

We have a new Inspiration Friday post for you this week. We would love for you to participate! Here's how it works: Every week, I post a new picture. If the picture inspires you to make something (anything at all really), send a pic of the item you made to contest@beadfx.com with the subject line "Inspiration Friday".  You don't have to complete it in one week - take as long as you like. The idea is to get you creating, and possibly working with colours or materials that you wouldn't normally work with.

Here is a bracelet I've made based on the fall image from last week. It's not quite done. This bracelet took me quite a while compiling the beads, wiring them up, and such. The bracelet also contains some boro leaves, and some handmade bronze components. It needs a fancy clasp, and I'm now making a handmade one for the bracelet. I'll show the finished bracelet in a week or two once I get the clasp finished.


And now we have a new inspiration pic for you. Go forth and make something!

Atlantic Sentinal (Member's Choice Photo of the Day, Main Feature: 08/29/10)

You can bling just about anything

Really - even bandaids ....Yup, bandaids.


It's all completely over the top, but I'm kinda liking the earbuds.....

Thursday, September 23, 2010

What's she playing with now?


You may be asking yourself - what on earth is she going to do with copper pipe, and a pipe cutter? Those of you who have read Stephanie Lee's Semiprecious Salvage know exactly what I'm going to do. For those who haven't - stay tuned next week!  I'm very excited :-)
Last week, I posted the very sad story of the flooding in my basement, and the complete ruin of a metal clay project I was working on. Once I finished crying of course - I started fresh. Fortunately, on one of my walks with the girls - we had collected many, many maple keys. I still have lots more. 

These are currently being painted with layers of art clay silver paste. Once done, each key will have at least 10 layers of paste. I'll also be attaching a fine silver wire to the back of each, so they can be hung as a pendant.

At this point, there are 6 layers of paste. By next week, I should have them completed.


How pumpkin pies are made

One of our lovely customers sent us this Thursday funny. I'm still working on my first coffee, and it took me a minute to 'get it'.  Putting my glasses or contacts on would have helped too ;-)

Thanks Sharon!

Wednesday, September 22, 2010

Causes of Colour


Yesterday, while perusing the etsy blog, I came across an interesting website on the causes of colour. As beaders, and jewelers - I know we're all intensely fascinated with colour.  Explore the three causes of colour. A fascinating read!

Tuesday, September 21, 2010

Classes coming up next week...

Leafy Waterfall Necklace
September 27

In this class, you'll be bending, hammering, shaping, and wrapping wire to make a beautiful necklace.


Chinese Knotting: Ball Knot
September 28

Here's another cool and versatile knot - the Chinese ball knot. You can construct bangles, rings, and beads with this knot.

Looking for a different class? We aim to please, so check our class page for other classes.

Adios!

Monday, September 20, 2010

Velour Tubing


I'm still having fun with these Dragon's Eyes and gluing them. (There's the ring from last week again. Camera hog.)

I wanted a nice simple thing to hang one off - and this new velour tubing was passing across my desk ... .

My initial thought with the velour was that you could use as a cover for memory wire, and, in fact, you can. But I think I like it much better for this - it is over regular softflex.

And it hides the crimps!

Just cut your tubing to the length you want.

Attach your crimp and clasp to one end of the softflex - and you can use the plain old dull original for this, and thread through the tubing. Scrunch up the tubing just the tiniest bit - and attach the crimp and the other half of the clasp on the other end. Then, when the tubing relaxes back out to full length, it covers the crimp and all you see is the clasp.


Make sure you don't scrunch up the tubing too much, because if it can't expand back to it's full, natural length, you get a permanent buckle/wave in the necklace. Not so good. Just a couple of mm is all you need - enough to cover the crimp.

I like the look of it - soft and elegant and casual at the same time.

Sunday, September 19, 2010

The Joy of Metal Clay: Reconstituting dry metal clay

Sorry but my planned post on base metal clays will not happen this week.
My other work, a 7-year-old birthday party, and a craft show this weekend have gotten in my way of playing and experimenting, sorry.

I thought long and hard about topics for this post and then I came across this useful video about reclaiming your dried up clay pieces. One of my favorite properties of silver metal clay is the ability to completely reclaim your unfired pieces. I have many pieces sitting waiting for either inspiration that will improve the design or to be reclaimed. The advice I give to my students is to remember that clay can be reclaimed! Early on in my metal clay career I was so excited to create and afraid of reclaiming that I fired many pieces that I ended up being disappointed with.
In this video, Lisa Cain, artist and instructor from the Mid Cornwall School of Jewellery, explains her process of reclaiming her silver clay. I have tried many low tech techniques and methods that I thought would be simpler but this is the best method.

Here are my comments:

1. She uses a coffee grinder to break up her dry clay. I have tried using a pill crusher or just cutting it and well the coffee grinder is the best option. (Note about pill crushers, I have bought several and the only one that I have found useful is the one I bought at Whole Lotta Whimsy - believe it or not there is a difference between pill crushers out there).

2. She strains her dry clay through a mesh. I think this is a great idea. I have used a tea strainer that works great. Skipping this step you will lead to hard bits that don't mix well with the clay (trust me I have tried it).

3. Mixing the clay with a little water. My approach tends to be different here. I will mix my clay powder between plastic wrap as I find it keeps it all together and I can use my hands to knead and mix through the plastic.

I have tried re hydrating the clay using other methods which can work but, I do find often I still get lumps. Of all the methods I have tried I think this one is the best.

One last note. This method does tend to produce DUST. Wear a mask.
If you have any thoughts please share!!!

Heather

Saturday, September 18, 2010

The Business Chat - Packaging

So you made a fabulous necklace, it's gorgeous! It's stunning! It's beautiful! It's expensive!

Scene A: You've shot a series of fabulous photos, listed it online for a lot of money and wham, it sells! Oh boy! You celebrate the sale, dawdle around and a few days later remember to mail it out. You shove the necklace in a bubble mailer and send it.

Scene B: You've taken it to a craft show and put it on your table, someone has fallen madly in love with it (and you!) and given you money for it! You take the money (oh boy, someone has paid real money for your work!) and you pop the necklace in a ziploc baggy and hand it to her.

In scene B since you're present for the sale you'll be able to see her face fall. In scene A, when the customer opens her mailbox, grabs the envelope, you aren't around to see her disappointment when she opens the package.

Your customer isn't disappointed in the necklace, however, she may love it a little less (and love you a little less) because the fabulousness of the work has not been continued. You have missed a golden opportunity to make the customer feel special. Packaging says something about you, your product and your business. It is one of the best opportunities you have to communicate with your customers and remind them why they should be shopping with you instead of somewhere else. Offering outstanding packaging can promote repeat business for your shop.

The most important aspect of packaging is to make sure that it is consistent with your brand. This means that it has to look like your work. Since you've sold an expensive necklace in this example, your package should reflect this. A ziploc baggy doesn't say oh, this is definitely worth a lot of money, it says cheap, quick, couldn't be bothered doing anything else and don't care. If you're making $10 hemp/wooden bead necklaces then sure, a ziploc would be okay. Although I would add a sticker to the bag first with my company name on it.

Speaking of stickers and company names, you should ALWAYS include your company name and contact information in the package. Make it easy for the customer to find you again and buy more. If this is given as a gift, can the recipient find you? A business card will do or you can get more creative. For online orders a lot of businesses send a small freebie.

A "freebie" is a small item that you include with a package at no additional cost. Freebies aren't something that is required to make your packaging outstanding, but they sure can help your buyer get excited about their shipment and remember their overall experience shopping with you. Think about including freebies with your packages like a promo button, a mini sample of something else you sell, a coupon or two that encourages them to come shopping with you again (or get their friends to check you out), or something small and useful that they can use again.

When mailing a package you should always include a handwritten note, even 2 little words, Thank You! This small touch shows that you are a real person and you care. You can also tell them any additional information about the item, such as care instructions. Including a note is another chance to get creative with details, so think about how well it fits with the overall look of your package.

Let's talk about what your package should look like. It should look like you. If you were buying your necklace, what would you like to see? If the necklace is a classic, conservative and expensive then a chinese take-out box (cute as they are) isn't a good fit. If you're making less expensive work, then a gold box with gilt ribbon isn't a good fit. Play with lots of different packages. Add ribbons, use confetti, use rubber stamps, try making your own evelopes out of recycled comics (if that fits, and hey, it's green and cheap!). Make your packaging as truly unique as you, your products and your business are.

Packaging supplies can be found just about anywhere. Here's a few of the bigger suppliers online, it's by no means all of them, just ones that have been recommended to me. If you have a good source of creative packaging, pass it on and add it as a comment. If you have fantastic packaging that you're super proud of why not show it off? Blog about it and then add a link here as a comment. Show it off people, you work hard at this stuff!

  • Creativebag.com
  • Noblepackaging.com
  • Luv2pak.com
  • Dollar stores
  • For shipping supplies such as bubble mailers - uline.com

Friday, September 17, 2010

Inspiration Friday

It seems I really, really want to make something from this pic - I actually posted this a couple weeks ago during the madness of getting everyone back to school. I forgot I had posted it, and chose it again from among a huge selection of photo's.

So there we go - make something - It really can be anything at all, and not necessarily related to jewelry. One you've got it made, send us a picture and we'll post it here. Submissions should be sent to info@beadfx.com with the subject line "Inspiration Friday"  There is no timeline, so please don't worry about trying to complete it within a week.

Here's the fall pic (again!) :-)

Barn in the Fall

Murphy's Law

As you know - Yesterday I was very excited to show off some new pendants I've been working on. Those of you in the Toronto area know that we got an inordinate amount of rain yesterday - or at least we did here in Whitby.

My new, unfired metal clay pendants were on my workbench in the basement. I was about to start the process of photographing them when I discovered water dripping from my bench onto the floor below. Yes - water and clay.... I have nothing now for you other than a big expensive puddle of silvery pasty mess. I spent the day mopping up a flooded basement. Sigh - hopefully, I'll have better luck next week. And I have a new inspiration pic coming at you in a few minutes!

Thursday, September 16, 2010

Yippee!

I am completely ecstatic. I have just found an awesome daycare spot for my 5 year old - within walking distance from my house. I now have 4 whole days per week - completely to myself to actually get some work done.   Stay tuned later tonight for my what will now be my regular Thursday - what's she experimenting with now post. Yahoo!

Wednesday, September 15, 2010

New Products Coming

Just got back from a big gala do at the wholesalers - demos - new products and the Swarovski fall product launch.

New colour from Swarovski - Sunflower - somewhere between Light Topaz and Citrine.

New Pearl colour - Light Gold

New effect - Silver Night - like a black diamond - but darker.

New shapes - Clover bead, Lucerna, Helios, Sphinx Eye.

New colour from Tierracast - Soft Black - blacker than gunmetal.

Re-release of the Farfalle - in nicer colors.

Pics below.


Tuesday, September 14, 2010

Coil, Coil...and Coil away!

Are you looking for new, fanciful ways to work with wire? Do you have a Coiling Gizmo that’s just sitting there? Or do want to buy one and are a bit skeptical? Well this is the class for you!!!Rae Huggins presents Coiling Gizmo Techniques. Take any of Rae's coiling classes, and you'll leave with coiled jewellery goodness.
Classes start Sept. 20.


If you've ever seen any of Dwyn's lampworked beads, you'll know she loves cool and weird shapes. Want to learn how to make long and shaped lampworked beads? Try the Techniques Night: Long and Shaped Glass Beads with Dwyn Tomlinson coming up Sept 21, 7-9:30pm. You need to have some lampworking experience in order to take this class.

In beading solidarity!

Monday, September 13, 2010

Using a Cabochon

I've been making these dragon's eyes lately - and someone around here, who is as fond of dragons as I am, just had a birthday - so I figured a dragon's eye necklace was in order.

The thing about these dragon's eyes is that they are made "off-mandrel." Which, for those of you who aren't into lampworking, means that instead of being made on a nice, sturdy rod of stainless steel, like a bead, they are precariously balanced on the end of a rod of glass while being made - which makes them about an order of magnitude harder to make.

And means that they are not a bead - and do not have a hole in them. They are more like a cabochon, with a flat back.

Which means they need a little more creativity to use in jewelry.

I went for a cruise around the store with the eyeball in hand - the very thought of which brought me to another project - it's soooo easy to get distracted that way - looking for something to go with it.

The colour of the Vintaj components went beautifully with the colour of the glass - and the shape and texture of the filigree components also wonderfully complemented the piece.

So - gather some up and back home to assemble.

After several attempts at bending the filigree around the eye - I decided that approach wasn't going to work in this case - as the filigrees weren't large enough to get around the eye. Next approach was to glue them - but as they are open, I didn't want a messy background with glue oozing out around the filigree. To solve this. I backed it with a copper disk. I placed the disk flat, applied glue to it, put the filigrees in place - let the glue set. Then, made up more glue, applied to the filigrees and the back of the eye, and put the eye in place, and let it set and cure.


Then, I attached the next filigree pieces with jumprings, and added a chain. Because I wasn't sure how long to make the chain, I packed up my tools and the necklace, and headed off the the birthday celebration.

Once presented - I could then check for length, and add a clasp - and after trying it on and handling it a bit, we discovered that the filigrees tended to get tangled up, as the jumprings would slide around to the side. So, I added another jumpring, to prevent that.


At which point, someone said, "what about a dangle?" Well - those Vintaj dragonflies are nice - but need a couple more holes in them - so I dug out the new hole-punch pliers - which go live on the site on Wednesday night - Love these! - and put a couple of holes in the wings, used the left over piece of chain from the necklace, and presto!


Dragon Eye - Dragon Fly.


Oh, and that "eye in hand" idea - turned it into a ring. Wonderfully creepy, eh?

I used the Devcon 2 ton glue for these projects, and I have to say, I am uber-impressed with it. The dispenser gives you two small puddles to mix and it easy to recap. The glue is crystal clear, and dries hard and glassy without any trace of gumminess. You can see the glossy back here on the ring - it looks just like glass.


And so far - the ring has proven to be surprisingly wearable. It's received several accidental hard knocks, and shows no sign of coming off. I'm pleasantly surprised.

Sunday, September 12, 2010

The Joy of Metal Clay: Copper Clay - Part 2: Metal Adventures and other brands

Last week, I talked about the Art Clay brand of Copper Clay. This week I am going to cover the other types of copper clay, primarily the Metal Adventures CopprClay which is a type that requires kiln firing in a box of carbon.

You can check back on last weeks post for Art Clay Copper.

Tools:
The tools required to work with CopprClay are similar to what you would use with any metal clay. Either have separate tools for each type of metal clay you use or wash them well between uses (Exception to this is paint brushes, I have separate brushes for each clay). Personally, I can't afford to have two of everything so I just wash between types of clays (I have found that sometimes it is hard to get some of the copper colour off my textures but as long as I have washed off all the bits, I haven't had any problems. Oh, one other little thing, I have found that rolling an vegetable oil based modeling clay such as homemade Playdoh into the textures will remove a lot of the bits stuck in the textures).

Handling
CopprClay is quite a soft and supple clay. I find its texture very smooth and soft and it takes much longer to dry. It is fun to sculpt with. It is also more elastic and slower to dry which has it's pros and cons. If you are used to the quick drying feature of some of the other metal clays and you go to move your piece expecting it to hold its shape you may find it may sag and stretch. It does take longer to dry and it may warp during "speed" drying.

Drying
As I just mentioned CopprClay takes much longer to dry than silver clays (and Art Clay Copper). If you use a hot plate to dry your pieces you may find that CopprClay pieces can easily warp and become misshapen. If you are creating flat pieces the easiest thing to do is to weight it down so that the edges don't curl up (such as placing a tile or a book on top of it while it is drying on the hotplate). Otherwise you must flip and monitor your pieces in the initial stages of drying on a hot plate in order to prevent them from warping.

Firing
Firing CopprClay requires a kiln. It is achieved by by placing the pieces in a kiln safe container with activated coconut carbon (only coconut carbon, NO Coal carbon - I am not sure why but coal carbon won't work!)

There are detailed instructions here CopprClay Firing.

Here is a bried summary of firing: Once your pieces are loaded into the pan of carbon you place it on 1 " stilts (it is important to raise your box to allow air flow). The standard firing is to ramp your kiln fully to between 1700- 1800F and hold for three hours. The manufacturer warns that most pieces should sinter at 1700 and some pieces will blister at 1800F (sadly there is not clear answer and you have to figure out how your kiln fires to figure to optimal temperature for yourself ). There is also a two phase firing that the manufacturer recommends for enamelling you can check the detail on the CopprClay Firing page.

Personally, I have only tried the single phase firing and if I fire my Paragon Firefly at 1760F I find my pieces sinter properly (most of the time). I have had some occasional difficulties with firing but usually I attribute it to the fact that my carbon needed to be replaced.

Note about Carbon: Carbon contains very fine particles that become airborne when you pour or dig in your carbon. Use a dust mask and take it outside. It is surprising the black colouring that I get on my mask when I use carbon. Also Carbon will not last forever and it needs to be replaced or you may find your pieces will not sinter.

Finishing
One of the positive of using CopprClay and other clays that require carbon is that there is no firescale; therefore, no pickling. I allow my pieces to cool in the box in the kiln (the carbon takes along time to cool) then I will remove them and brush my pieces with a steel brush, wash off any carbon and tumble.


Other Copper Clays

There are other copper clays out there. The only other kind I have used is Hadar Jacobson's Copper Clay that comes in a powder and you are required to mix it. It is similar to CopprClay in that it requires firing in carbon and so on but has its own set of guidelines which you can find on Hadar's site.


I know there are more brands of copper clays out on the market today. If you have tried them let me know and tell me what you think!

Hopefully this helps you in your understanding of yet another metal clay medium.
Enjoy!

Heather

Saturday, September 11, 2010

The Business Chat - Selling on Consignment

We've spent the last few weeks talking about all the things you need to do behind the scenes to get yourself ready to sell. Now let's talk about selling your fabulous creations. There are 3 ways of selling:
  1. Retail - directly to the public
  2. Wholesale - a store orders X number of pieces and pays on delivery
  3. Consignment - a store displaying your work and paying you when it sells

Consignment is the most common method of selling to stores and the topic of today's post.
Selling your goods on consignment means that you get paid by the shop only upon the sale of your items- essentially, you retain ownership of your items until they sell, the store does not buy them outright. This is often the easiest way to get your products into a store and is a good first step if you're just starting out.


Consignment is beneficial for shop owners and designers alike: it allows shop owners to fill their shops with items at no upfront cost to them and lets them test out the saleability of your goods to their customers. For you, it's beneficial as you retain a higher % of the sales price on your items than you would selling via wholesale (or, you should!) while also testing our your saleability in different markets, and getting exposure in retail shops. A typical consignment agreement is 60/40 in your favour. Consignment is also good for selling one-of-a-kind or very high-end pieces. A big advantage of consignment over retail craft shows is that your work is continually on display somewhere, not just when you're doing shows or parties.


Even in a good store or gallery, there are disadvantages to consigning jewellery. One is the lag time between delivering your jewellery and receiving your money after it sells. Your inventory may be tied up for a long time without bringing you any return. The store or gallery may shut down and the owner may disappear with your jewellery and the money they owe you. The store may not issue payment promptly. Finally, a retailer has less incentive to promote your work since they haven't invested any of their own money in it.

It's very important to maintain more detailed records than you would in other types of selling. Inventory is money, your money, and it's sitting on a shelf in someone else's store under someone else's control.

When you do agree to place your work in a consignment store (either online or brick-and-mortar), make sure you get a consignment agreement signed! Most stores will have their own agreement: read it, and if you don't like parts of it, work it out before handing over your jewellery. Be sure that both parties have a signed and dated copy of the consignment agreement. A consignment agreement must talk about the following:

* Inventory: Generally, the agreement includes an inventory sheet of all the items that you are placing on consignment with the shop- it should list the item quantities, descriptions and retail prices.

* Sales split: When your item sells, the shop owner will retain a certain % of the sales price of your item, and you will receive payment for the remainder. The most typical consignment split is 60/40, with the designer/seller/you retaining 60% of the sales price and the shop getting a 40% commission.

* Payment schedule: The agreement should explicitly state when you can expect to be paid for work that has sold. Often, payments are made by the shops every month for all sales that occurred the month prior. You should also know how you will get paid (via check? paypal? cash in store?) and you should expect to receive a list of items that have been sold along with your payment.

* Duration of consignment: Each consignment agreement should have a trial period. Both the maker and the gallery needs to make sure that they are a good fit. Once the trial period is over you both have a right to end it. You should also be able to pull your items from the shop and have them returned to you whenever you'd like, as technically, you still own them- remember that. You don't want your items collecting dust on the shelves for too long and if they haven't sold after a period of time, then perhaps it's not the right market for you anyway.


* Shipping costs: For out of town/online consignment, it is usually the designer's responsibility to pay for shipping costs to the shop, and generally the shop's responsibility to pay for shipping costs back to the designer if the work doesn't sell. It's always best to ask the shop their policy upfront though.


* Insurance: It is usually the responsibility of the shop to assume the loss for stolen/lost property or items that are damaged by shop/customer error, make sure you clarify this up front!


* If damage occurs due to faulty workmanship on the designer's end (e.g. a clasp falls off one of your necklaces) then responsibility for that loss should be yours.

Here's one last BIG piece of advice. When you first start your jewellery career, and a store asks to carry your work, it is a real ego boost. Many beginner jewellers make the mistake of putting their work in every store that asks, thinking that stores = sales. This is not true. Take a really good look at a store you are considering for consignment. Make sure it's a good fit for your work. Would you invest money in this store? That's what you're doing by placing your work in the store. You are giving them your money in the form of your work. It cost you money (and time, which is also money) to make that jewellery. If you wouldn't give them cash, don't give them your work.

Kitchener Waterloo Knitter's Fair

Just a quick reminder - we'll be at the Kitchener Waterloo Knitters Fair on Saturday. Well - not the whole store - just the knitting related beads. Drop by and say hi if you are in the area!

Details here: http://www.kwknittersguild.ca/index.php/fair/about/

Friday, September 10, 2010

A one week break from Inspiration Friday

Sorry folks - With my kids getting settled in school this week,  I just haven't had time to do anything even remotely creative. Finally, as of today - both kids are now in school. Woot! :-)

And now that I have time,  I've got to get a move on with some paperwork, and other boring but necessary stuff.  :-)  I can hear Marg tapping her fingers from here!

And so, next week - we'll get back to making fun stuff! Have a great weekend - and if you happen to be in fusing class tomorrow,  I'll see you there for an afternoon of fire and hammering. There is something really, really therapeutic about that!

Thursday, September 09, 2010

Lampworking

I was thinking this morning that we rarely talk about anything lampwork related on our blog. Strange that, as we are a lampwork studio after-all. It was certainly our main thing when beadFX first started many, many years ago. Over 10 in fact!

Dwyn, our webmistress - and most excellent writer is also a very talented lampwork artist. While I would love to take credit for that, I didn't in fact actually teach her how to make beads. I tried however:

Dwyn was our very first employee back in the early days. One day, it was a little slow (or so we thought). I asked her if she wanted me to show her how to make a bead. So we sat down, and I think I managed to demo one or two. She moved over to the torch glass in hand - started to make a bead, and then the phone rang. I didn't get a chance to come back! The rest is history. She's run with it in a very big way. You can check out her personal blog - http://dragonjools.blogspot.com

10 years later - almost all of the employees at beadfx have at least taken a real class in making beads. Some love it, some not so much. I always like to say - with glass, there is no just sorta liking it. It's a passion, or it's not for you. No in between!  I've taken many hiatuses from beadmaking over the years. Either pregnant, or just too busy - but I always come back to it.

We'd love for you to come check out the studio any time - Rosemary is more than happy to give a tour of the studio. If I'm in (which unfortunately is a rare occurrence these days due to scheduling between the kids, and hubby) - I'm more than happy to spend a bit of time offering demo's - unless the phone rings ;-)

Wednesday, September 08, 2010

Planning for Fall

I don't know about you, but this Summer has gone far too quickly. I've got one back in school, and the second starts on Friday.  I'm looking forward to next week as things get back into a better routine.

I normally try to use the summer to plan for the fall - new classes, new designs, new things to learn. This summer passed by in a whizzing blur, and I have nothing yet planned for the fall!  I do plan to spend more time with metal clay, resins, and I'm hoping to to spend some time learning about enameling. That one has been on my to do list for a few years now. Once things settle down a bit I'm hoping my 'play with' posts become a lot more interesting for you.

Speaking of learning new techniques - What are your plans for the fall/winter? What would you most like to learn how to do? Do you plan on taking classes, or teaching yourself through books/the net/trial and error?  Curious minds want to know!

Tuesday, September 07, 2010

Knitters Fair, Wire Working and Bead Stitching

First off, Beadfx is going to be at the Knitters Fair in Kitchener this weekend. If you plan on being there, drop by and say hi!

If you're going to be in the city during the weekend, and you're looking for something bead/fun related, we have 2 classes you'll be sure to enjoy.

Introduction to Fusing with Jennifer Tough

WireWrapped Earrings and Pendants with Rae Huggins
And next week? You can learn Basic bead stitches with Cindy Vroom. You'll learn the Peyote Stitch, Russian Coralling Technique, Dutch Spiral and St. Petersburg Chain. A new stitch every week for 4 weeks. The cool thing is you can pick and choose the stitches you want to learn.


Adios Amigas!