Click here to visit ...

Sunday, January 31, 2010

Boggled - BJD

Every once in a while, I stumble across a new world. Some wholly undiscovered arena of "things people do." This one came about as a result of a friend on facebook commenting on one of their friends pictures - and the accompanying comment on "bjd" and dolls. What the heck?

So, I googled "bjd dolls" and got sucked into a entire world that I didn't even suspect the existence of.

BJD or ABJD stands for Ball-Jointed Doll or Asian Ball-Jointed Doll - as Wikipedia informed me.

From Wikipedia:

... any doll that is articulated with ball and socket joints. In contemporary usage ... modern dolls, particularly modern Asian ball-jointed dolls. These are cast in a hard, dense plastic, and the parts strung together with a thick elastic. Described as both realistic and influenced by anime. They commonly range in size from about 60 centimetres down to 10 cm. BJDs are made to be easy to customize, by painting, changing the eyes and wig, and so forth. They are fully poseable, anatomically faithful, if stylized, and can stand on their own.


And, might I add - the eyes are particularly haunting.

And they ain't cheap, folks. $500 - $600 seems common.

Here's a few sites so you can see what I mean. The English is a bit Japanglish on these.


So, after discovering that there was an entire world of customized dolls out there, how long would it be before I thought, "Geez - I wonder if there is a specialty jewelry market too."

So, I googled "bjd dolls jewelry" and yep - there's stuff here too.

http://www.minimode.com/BJD/

and on Etsy too. But - I notice - the market isn't flooded there. Only 44 hits (at the time of writing) for "bjd jewelry" on Etsy. So this might be a niche that needs filling? It would be kind of refreshing to make jewelry on a smaller scale - you can be lavish with the crystals and still make it affordable.

So - there you go. Whole new world out there. Go jewel it. ;-)

Saturday, January 30, 2010

Tucson Day 1

Today was the opening day of the Gem Mall, one of the larger wholesale shows in Tucson. There are two tents here - one about the size of a football field and the other about 2/3 that size. There are vendors here from all over the world - China, India, Africa, Australia. Probably the only major continent without representation is Antarctica.

Although semi-precious gems are the main draw at this show, you can find anything from strands of diamond beads to chips-on-stretchy-elastic bracelets for a $1. It's very much Caveat Emptor at a show like this though. There's lots of glass or dyed howlite masquerading as turquoise, for instance. Tons of Swarovski look-alikes. Although I had to grin at the vendor who was advertising his "crystal" as genuine Chinovski.

None of the piles of stones on strands have prices on them. You have to ask the price of everything.

Today I picked up stock from some of my favourite semi-precious dealers. I remember someone asked us recently if we had any green goldstone. I hadn't seen any around before, but this time I got a bunch in several shapes. Got some beads with large holes that could be strung with hemp, leather or a thinner kumihimo braid.

Picked up more of the rough chunks of pink quartz, citrine, pyrite and several other stones. Bought some interesting dyed impression stone cabs for those of you who like doing beaded embroidery around stones.

More good turquoise from the Sleeping Beauty, Kingman and Campo Frio mines. Some completely natural, some stabilized, but none of these have been dyed or colour-enhanced.

It's still early days yet, and I'll be back at the Gem Mall often. I'm open to suggestions if you have anything you especially want me to look for. I wish I could take pictures of this place to show you, but cameras are strictly forbidden at this and most of the other locations.

Tomorrow I'm off to look for sterling and the brushed copper beads.

Sneek Peek at Next Week

s20429 Stringing - 2.5 mm Wire Lace Ribbon - Brass (yard)
More Wire Lace, new size!

s23366 Stone Beads - 13 x 18 mm Oval - Red Creek Jasper (strand)
Stone of the Month - Red Creek Jasper


Nifty tropical resin beads.
s23513 Tropical Palm Resin Beads -  Flat Oval - Palm Stalk Crackle (1)

Friday, January 29, 2010

Tucson Bound

Whohoo- It's that time again. Tucson, Arizona is home to the biggest most fabulous bead, gem, rock, and jewelry shows. Some people may think of it as one show, but in fact it's made up of many, many shows. There are wholesale only shows, retail shows, shows with both retail and wholesale, and some where you need specific jeweler credentials to get in (the ones with the tables full of fine precious gems)

Marg is off as of now. Her flight was leaving this morning, and she'll be there for close to a week I think (I forgot to ask when she'd be back). Hopefully, she'll get lots of pictures, and get updates from some of our many friends who are either going down shopping - or have exhibits.

Fun, fun, fun!

I found a couple of video's on Youtube from last year which shows a little of the scope, and extravagance of the shows. I was surprised to not find very many. It could have been my search though....


Thursday, January 28, 2010

New postings up

We did manage to get the new Inspiration up, and my Intro to Fine silver fusing class has also been posted - whew, what a day :-)


Dwyn has outdone herself as usual - Check out Queen of Da Nile :-)


And finally - the intro to fusing class. Yes, I will absolutely be offering this again. Short notice, I know.

Wednesday, January 27, 2010

Fusing Class Info

Last night did not go quite as planned - I'm working on the details now, and I'll post to the blog again as soon as I have it done. Stay tuned!

Tuesday, January 26, 2010

It's Almost February...Who Can Believe It!

January is almost over and that is exciting for many reasons. First of all we are one month closer to spring!!! Secondly, we have some awesome classes coming up this February!!!

To end off the month, Jennifer will be putting up the details for her Fusing class tonight! She will be doing a fused bracelet using only fine silver wire. You will even learn to make your own clasp! Class runs on Saturday January 31st. Check the site for all of the details tomorrow.

We begin the month of February with a Technique Night with Dwyn Tomlinson--Long and Shaped Beads! Some lampworking experience required. This class is for the Advanced
Beginner or Intermediate lampworker. This class runs on Tuesday February 2nd from 7 to 9:30pm.


Thursday February 4th is Basic Bead Stinging with Nadine Foskin from 6:00 to 8:30pm. This is a beginner class and is rarely offered on a Thursday night so do not miss this opportunity.


Saturday February 6th is the Turquoise Lustre Blooms with Stephanie Dixon from 10 to 1pm.


Stephanie will also be offering a ring class in the afternoon. We are just working out the kit fee and the details will go up on the site. The cost of the class is $30.00 (+GST) and it is a beginner level class.


Tuesday February 9th is another Technique Night with Dwyn Tomlinson--Foiled Again, Keeping it Shiny with Silver Foil. Some lampworking experience required. This class is for the Advanced
Beginner or Intermediate lampworker. This class runs from 7 to 9:30pm.


Friday February 12th is Charmed I'm Sure with Heather Bell-Denison. This is an introduction to Art Clay Silver. It runs from 10:30 to 5:30pm.


Saturday February 13th is a new class for Heather, An Introduction to Art Clay Copper. This is a different type of class than the Art Clay Silver. Art Clay Copper is a new product that Heather has been working with a lot. This is a beginner class and it runs from 10 to 5pm.


Lezlie Winemaker will be here this month. She is offering two Lampworking Weekends on Saturday February 13th and 14th and then again on February 27th and 28th. These are both beginner classes and run from 10 to 6pm each day. Lezlie rarely teaches with us, so this is a once in a while treat! I would book early to avoid disappointment.


Dwyn has a 4 Hour Introduction to Lampworking to Tuesday February 16th from 4 to 8pm. If you are wondering about Lampworking, trying to figure out if it is for you, this a great way to start!


Saturday February 20th Stephanie Dixon is here with her Wire Crochet Earrings from 11 to 1pm. This is a beginner class.


Saturday February 20th Amy Waldman-Smith will be offering a 5 hour one day Introduction to Lampworking from 11 to 4pm.


Sunday February 21st is Robert Burton's Silver Braided Bracelet class from 1 to 4pm. This is an intermediate level class. Beginner course/some wire working experience required prior to taking this class.

Heather Bell-Denison is offering the Art Clay level One Certification Course on February 26th to the 28th. This is an advanced class, suitable for those students who are very serious about Art Clay. Students are required to have taken an Introduction course as well as having completed many projects. This course is not offered often, so if you are interested now is the time to register!


Don't forget about Happy Hour Torching on Thursday evenings, buy one hour get one free!

Happy Beading

Monday, January 25, 2010

Knotting Stretchy Cord for Bracelets: Surgeon's Knot

I got an email from a friend - she says she can't make head nor tail of the surgeon's knot instructions. She's fixin' to make a stretchy cord bracelet - and needs to know.

When using stretchy cord to make bracelets - securing the knot so that it doesn't come undone is really the only challenge.

You have 3 options.

1 is to use a crimp to help secure the knot, and I personally found that more awkward. A crimp by itself doesn't seem to do the job, and I usually wound up tying the knot around the crimp. Maybe that's what you are supposed to do - but it didn't really appeal to me.

2 is to secure the knot with a drop of glue. This certainly helps. Always helpful with knots in cord or anything non-wire. Please - do not tell me that nail polish also works for this. What - you don't have glue but you have nail polish? Puhleeze. Stick to using nail polish for what it is designed for - i.e. a mask on beads being etched, or painting on the brushed silver beads. Or using to mark your tools for when you are attending a class.

3 is to use a surgeon's knot. Which brings us to: What is a surgeon's knot?

Ok - we are familiar with the plain old knot - known as the "square" knot. This is the one you learned as a kid - you have a end of string in one hand (left), and another end in the right hand. You put them together, and put the left over the right. Now you point those ends back at each other and do it again, but this time, you put the right over the left. Now - for the surgeon's knot - take that end that still sticking out, either on the right or the left, but for argument's sake - let's take the one on the right, and wrap it around and stick it through the loop one more time - so you have made that tying motion twice on the second round. Now pull tight.

Here's my diagram. This is as knot in a single cord - but works fine for knotting two ends together.

There is a video here - at ehow, that demonstrates - with two ropes (or two ends). He shows you doing the extra loop first, but I don't suppose it matters much. (The young gentleman demoing this has other very worthwhile demos in knot tying too, btw.)

Hope that helps! If it doesn't - let me know and I will do a video!

Sunday, January 24, 2010

Cool idea - "Provenance Scuptures and Jewelry"


Jewelry and Sculptures made, at least in part, with scrap from the item they represent i.e. a small sculpture of the Concord - made from an actual rudder from the Concord.

TMB Art Metal - cool, eh? Would make a great gift - can't imagine that they are affordable, however!

Saturday, January 23, 2010

Sneek Peek at Next Week

s23468 Stone Beads - 12 mm Coin - Blue Apatite (1)I've been playing with all the lovely new stone beads. Blue Apatite - like looking at thunderstorms in a scrying glass. Or Petersite, chocolate on the snow with gold shimmer eyeshadow. s23473 Stone Beads - 20 x 10 mm Double Drilled Oval - Petersite (1) Or big, scrumptious rondelles - pregnant with possibilities.

Stone beads - and you thought regular beads were addicting!


s23476 Stone Beads - 18 mm Faceted Rondelle - Red Tiger Eye (1)

Friday, January 22, 2010

Beading games

I was hunting around the web trying to decide what to write about today...shhhh, I'm supposed to have these planned in advance! :-)

I started typing 'online beading' and the first thing that popped up was 'online beading games' hmmmm....I didn't know there were any. My daughter has Jewelry Design Studio for the DS, which she loves playing. I was curious if any were of a similar caliber. I generally try to stay far away from computer/online games. As a teen, I was highly addicted to Sid Meyers game 'Civilization'. I will never get back those hours wasted.

The first I clicked on is cute, but really simple. You can spell a name on a bracelet. 3 minutes of ammusement, if that - tops.
http://www.agame.com/game/make-a-bead-necklace-.html - They have the option of sending your creation to a friend. This feature doesn't work at all.

This one is a little more addictive - http://wellgames.com/free_online/beadz/ - tetrus style.

Next one on google was this link - http://www.azdressup.com/design/pixel-bead-art.html - Unfortunately, it lost me as it took a full minute to load before I gave up. I'm impatient.

Here's another one that would appeal to to 4-6 year old set. I think anyone else would get bored in a microsecond. http://www.girlsgogames.com/game/Dream-Necklace-Maker.html It's basically a picture of a woman that you can customize. You can make her hair pink, her lips gold, and swap out her jewellery.

Then of course there are the games that use beads, but are not actually online. Mancala was traditionally played with beads, stones, or seeds. Mancala is similar somewhat to Chess or Go

Now, back to work...and don't spend all day playing the beadz game - at least don't blame me. :-)

Thursday, January 21, 2010

Tatiana Van Iten

I recently across the work of the highly talendted beadwork designer. You can see a video of her at bead and Button


While I wasn't able to actually find a site of hers online. Google her name, there are a ton of examples of her work - Tatiana Van Iten

Wednesday, January 20, 2010

New Payment option for micro businesses

I wanted to pass on a resource I recently came across. I'm sure this will help some of you!

If you're one of the many micro jewelry/bead businesses who only do the occasional show, or sale of your creations - A new payment option has opened for Canadians. Some of you may have heard of Propay. It's an American company that has been getting rave reviews amongst the indie business set. Up until now, it wasn't an option for Canadians.

Propay allows you to accept Visa, Mastercard, and Amex at shows. More details can be found at their website. The fees are a little more expensive that what I'm used to seeing through beadFX - well alot, but I've never compared it for a smaller scale.
However, there is only a small annual fee, and no set up fees, plus no monthly terminal rental charges. I'll bet the very small small business only doing a few thousand a year -this works out quite well.

http://www.propay.ca for more details

Tuesday, January 19, 2010

Metalwork for Beaders and so much more!

This Wednesday January 20th is the first week of Suzanne Crudden's 8 week Metalwork for Beaders class. There are only a few spaces left! In this class rather than focusing on the technical aspects of professional metalsmithing we will focus on having some fun with metal. Students will learn traditional techniques as well, such as, how to saw, pierce and solder metal. Our focus will be not be project based but on skills that you will be able to practice at home with your own work.


This weekend January 23rd and 24th is a Glass Bead Making Weekend with Amy Waldman-Smith. Please note that the fee for this class is $240.00 (+GST). As of February there will be an increase in class fees. This is your last chance to get this class for this price!


Stephanie Dixon is here on Saturday January 23rd for two classes. While her morning class, Wire Bead Crochet Basics, is full there is still room in the afternoon class, Wire Bead Crochet Multistrand Necklace from 2 to 5pm.


There are only 2 spaces left in Robert Burton's Wire Working and Wrapping 101 beginning on Sunday January 24th. This is a 3 week beginner class.


Tuesday January 26th is a Metal Clay Play Day with Jennifer Tough from 11 to 6pm. Please register in advance.

Dwyn Tomlinson has a series of Technique Nights coming up, beginning tonight with the Wave Bead from 7 to 9:30pm.


January 26th is Encasing and Feburary 2 is Shaping Bicones and Long Beads. Tuesday February 9th is Silver Foil--Keeping it Shiny! And last but not least is Off Mandrel Pendants on February 23rd. Check the site for all the details on these classes--they will be up soon!

Don't forget about Happy Hour Torching on Thursday from 5 to 9pm. Buy one hour get one free!

Happy Beading!

Monday, January 18, 2010

Multi-strand necklaces and a few thoughts on photography


What IS it with the fruit flies? It's the middle of winter and I have a dancing cloud of drosophila melanogaster in my kitchen. (See - that high school biology class was good for something - 30+ years later and I can remember the scientific name for the fruit fly. Can't remember where I put my car keys, but I can rememer drosophila melanogaster. Go figure.)

These fruit flies seem to have become immune to my tempting traps of fruit juice and Grand Marnier, (selective breeding - see last comment about 30 year old biology class) - and are starting to annoy me. I've taken to vacuuming them out of the air periodically, into the central vac. I hope they are dying in there, and not mutating into giant, angry fruit flies that will attack me when I next open the canister. "Mutant Fruit Flies Attack and Kill Home Owner - film at eleven. "

What has this got to do with anything? Absolutely rock all, but hey - pain shared is pain diminished.

Not much new to say about photography this week, except! - I've started to see things differently - started to think about taking pictures for pictures sake, instead of illustrative purposes. I actually spotted a big rusty door in a factory wall and thought - that would make a cool picture. Didn't have the camera with me - but it's a change in the way I think - so that is cool. Mental note - take the camera more places. The accompanying photo is of the Dude - after rooting about in the snow. I freely admit to being biased, but I think he's a very handsome boy.

Anyhoo - I thought I'd reprint this article on multi-strand necklaces, as it is now buried in an older part of our website that you can't really find any more - but the information is still useful. This details how to collect up multiple strands in a necklace and neatly secure them.


Oh, and by the way, if you are a lampworker and want to make the focal bead that is shown here, I have an upcoming class on foil beads. Some lampworking experience required, but not a whole lot.


Multi-strand Necklaces

There are multiple ways to make multi-strand necklaces, but here is one very simple technique.

The basic idea is to:


  1. string all the strands separately,

  2. tie them in a knot over a loop of wire,


  3. and hide the knot in a decorative cone.


Here's how.


I start with a little planning - what are the elements that I am going to use, am I going for a random look, ethnic, sophisticated, etc. I might string a few test beads to ensure that they look good strung together. My approach for this project will be to string from one side to the other, but choosing to string from the centre to the ends, first one side, then the other, is valid too.


In this case, I have decided to string the focal bead right onto the strands. I have choosen to use very light (fine) Softflex cable, so that I can knot it, but it is strong enough for the weight of the lampworked focal bead.

Where ever you are going to have multiple strands come into close contact with each other, either at the clasp, or at an element such as this focal bead, you want to reduce the size of the strands. Do this by selecting smaller beads for this place in the strand. You can see here that I have put 3 size 6/0 seedbeads next to the focal bead. I will do the same for all the strands as they go into and come out of the focal bead, and again, at the ends where the clasp goes.


I am securing the focal bead by adding a top-drilled bicone and then threading back through the focal bead.


Now, string the other side. Notice I have LOTS of extra beading wire - I cut it long. Not having enough as you get to the end of the project is very frustrating. At this point - I am approximating on the length of the strands, as the pattern is random. I will refine it later.


Now, add more strands. Continue to select small beads around the focal bead.

Keep 'em small.


Keep 'em small at the clasp end too.

When I got to three strands - I was starting to run out of beads, and three strands of these bigger beads looked pretty good, so I chose a length, and started adjusting the strands. I am going to go for 8 inches on either side. (Adding the cones and clasp after will make this about 20 inches, which is a flattering length for me.)


I even up the ends


and have the sides matching.

Make a wrapped loop in your wire and thread your strands through it.


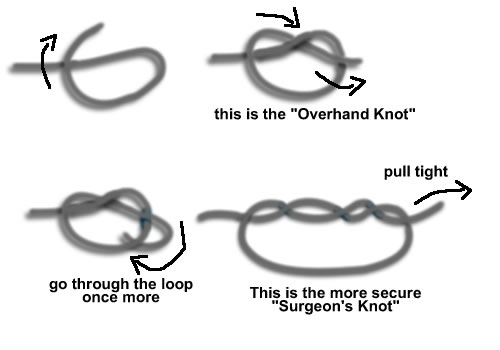
Knot them all together around the loop.

I tie another knot (square knot) over it, and add a third if the bulk is not too bad.

(To hide the ends, string them back down a strand for several beads and cut them off carefully, ensuring you don't cut the main wire. A dab of glue on the knot will prevent it from undoing as well.)


Using tweezers to pull the strands through as you tie the knot can make your life easier.

Now, slide on your decorative cone …


… to conceal your knot and the looped wire.

And put another wrapped loop directly above the cone. If you are adding an extender chain, you can add it before making your wrapped loop.


The secured cone and extender.


Do the same for the other side, ensuring that you have slid all the beads down as far as they will go to the other side before securing the knot. They do not have to be super tight (the necklace has to curve and move), but you don't want a gap appearing at the top of the necklace after you've worn it a couple of times.

Add a split ring and your clasp, or attach the clasp directly to the loop as you did with the extender.


Voila!


Wear and enjoy the compliments!


Things to remember:

  • smaller beads at "bottlenecks" such as claps, focals, etc. make the strands more managable.

  • knotting all the strands together around the finished wrapped loop is way easier than one at a time around the wire and then wrapping the loop. Trust me on this one.

  • larger beads string fast - this project makes up very quickly

Cheers!