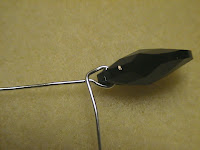
Heather asked me about wiring up briolettes - so I thought I would show you that. In a nutshell - think of it as doing two wrapped loops, like making a link!
If you are hanging any bead with a vertical hole - you run your headpin or wire through the hole and make a wrapped loop at the top, but if you are hanging a bead with a horizontal hole - either side to side or front to back - you need to figure out how to deal with the other end of the wire.
 Let's take a look. Remember - you can click on these images to see a larger version.
I'm going to ease you into this.
Start with a nice weight of wire that is easy to bend. I'm using 22 gauge Artistic brand wire for these pictures.
Slide your briolette or drop bead onto the wire, about 1.5 inch onto the wire, and fold the wire up on either side of the bead - so the bead is at the bottom of a U bend.

Next, you need to deal with that tail of wire, so you are going to wrap it around the long wire. To do this - continue to fold the wires together until they cross.

Now, wrap the short wire around the long one - keeping the wraps next to each other. Holding the wire with a pair of thin pliers at the loop, just at the top of the bead will help.

Slide a complementary bead onto the wire - and make a wrapped loop on the other end.
See a recap of wrapped loops here, and a video here.

 There you go - one version of a wrapped loop.
But let's explore that "wrapped loop" idea a little further.

 Make a the start of a wrapped loop and then add the bead, instead of bending the wire around the bead. This is good for fragile beads that might chip, or for a consistent look with consistently sized loops.
Then wrap the tail around the main wire.
 Just do a couple of wraps, and then add a wrapped loop at the other end. This time, we'll skip the bead in the middle - as it may not work with your design.


 Finally - what if you want less round loop for the bead, more triangular, say?
Then simply form your initial "loop" around your chain nose pliers, instead of the round nose pliers. The angular shape of the chain nose pliers will give you a more angular "loop."
And ...
If you don't trim the tail from the first loop right away, and carry on and make your next loop, you can more easily judge when to trim the wires so that they fit down together nicely.
 Wrap your second loop up to the last loop from the first half, then unwind each wire tail slightly and trim - now they bend down nicely and fit together for a near invisible seam. Use the round hole in your crimp pliers to bend them back down into place.
 The end result can be near invisible - showing only on one side.

And there you have it - the painless way to wire wrap a briolette or drop bead.
Cheers!


2 comments:
Thanks for that photo tutorial!
Can you also show one where the wire is wrapped down around the briolette to hide the hole (like a home-made bead cap) What do you do with the wire end, tuck it under?
Thank you so much, Dwyn. The first one is what I was trying to do and somehow it just didn't look right. And I do have 22 ga. Artistic wire. Yours looks a lot better than mine did, but will go downstairs and try again. I have the briolettes to make 2 pair, so will forge on.
I have been inundated by houseflies and between a *lung-killing* spray and the flyswatter, think I got them all. The neighbours said they are being bothered by them too. I killed about 50 on Saturday....blecchh!!
PS.....As there are 2 Heathers on here, I try to remember to post as "Figgs" or "HeatherF", just so I don't confuse you***
Post a Comment