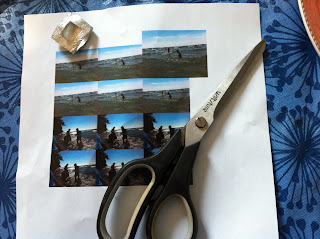
To insert a picture into my piece, the first thing one needs to do is to size the picture so that it fits. I had a fancy software program which I have yet to reload onto my computer so I have found that I have a few quick and simple things I can do. What I have found is that cutting and pasting the picture you want into a Word Document and then double clicking on the picture while it is selected and you will get a "format picture" screen. From this screen you can select the "size" tab and then adjust your size to shrink the picture to the approximate size you need. This is a fabulous trick as one of the biggest challenge is getting the picture to be the right size for your piece. I will often cut and paste several pictures to have a selection as well as a back up if I cut the first one wrong.

After printing, I take my picture and I cut out a shape that will fit into my piece.

Once cut I slide the cut picture into the piece to make sure it fits properly.

You can print your picture on what every type of paper you wish. This time I have printed it out on standard laser jet paper. When I do this I find I need to put tape on the back of the picture so that the resin doesn't completely saturate the picture. (If I don't apply tape to the back of the picture, the resin saturates the picture and makes it translucent, not the effect I am looking for.) Just a strip or two of tape, like Scotch Tape to waterproof the back seems to work fine.
Next you want to mix up some resin. (Follow the instructions on the resin you are using). The key to mixing resin is to make sure you have equal portions and to try not to incorporate bubbles into your mixture). Sometimes I will weigh out what I pour to make sure they are equal, sometimes I don't. If you don't get the mixture right the resin will not set!!!!

Regarding bubbles. If you notice in the picture below, I have a lot of bubbles in what I made up. One trick to reduce this is to mix by pouring back and forth into the containers. Today, I did not have the patience and just stirred vigorously. (if you get bubbles they can be removed before the resin sets by applying light heat, what I do is place my piece on my kiln brick and lightly heat with a torch, just be sure to do it lightly, otherwise you will burn the resin!)


No comments:
Post a Comment