Click here to visit ...

Sunday, November 28, 2010

The Joy of Metal Clay - What to do with your less than perfect pieces....

OK, so the title "less than perfect pieces" is probably not the best title. As many of those of you who know me will know that I am not one for absolute perfection. I embrace the nuances of imperfections (most of the time). What I mean in the title is what to do with the pieces you are not so happy with.....


I, being the experimental woman that I am, will often make crazy things that afterwards I say to myself "What the heck was I thinking?" Over the years I have managed to temper this spirit (slightly) as this can drain your bank account. I have learned to play with plasticine, playdoh or polymer clay to get some of this crazy spirit out without ruining my more costly metal clay. Another cost saving solution I have adopted is to make prototypes in base metal clay.

Needless to say I do have a large bin of stuff that I am too embarrassed (or proud) to place on my table for sale. So what the heck do you do with it?


I will often keep it in a bin and pull the pieces out every now and again to see if I am inspired to add something to the piece to improve it. Other pieces are in a pile to send to the refinery (whenever, I around to it). Sometimes take some of the disastrous silver metal clay pieces and break off pieces and melt them into silver balls to add to something else.

Still, I have a large containers of stuff just gathering dust.

During show this fall, I had an epiphany. What if I combined it all together into one large crazy necklace?

It may not be for everyone but here is the result:


The great thing is I can still take the pieces off and use them for something if I am inspired and they are all visible and now I can actually see them on a regular basis.

You don't need to make it into a necklace, you could just make it a bracelet. I was lucky as I had tons or copper and bronze rings to make the chain but you could use a thick purchased base metal chain and add you pieces too.

I love this necklace of wacky creations and now the pieces aren't hiding in a box in the studio but getting to see the light of day.

All together they make a perfectly imperfect piece!!!!


Heather

P.S. Would you believe I have enough to make more of these necklaces???

NOTE: By the way, I will be supervising the Metal Clay Play day for Jennifer Tough TODAY at BeadFx. I don't know how much space there is but stop by and say high. Participation is $10 per person and allows you access to the studio and tools and includes firing of your silver clay pieces made. I won't be teaching but working on some pieces and I will be available for questions.


I will bring the necklace with me...


Saturday, November 27, 2010

The Business Chat - Booth manners

Hey ho people! I have good news for today. After 2 days of the 11 day One of a Kind art show I am happy to report that the economy seems just fine. Consumer confidence is definitely up and people are buying. For those doing a craft show in the next 29 shopping days before Christmas you should do well.

Of course how well you do financially is somewhat dependent on how well YOU do in the booth. There is no magic recipe on how to sell however there are some basic Do’s and Don’ts to booth behaviour.

Actually selling is a hard part for many people. Your booth is a store that you own and you are a retail sales clerk. The only difference is that you are selling your own work and not a generic product. I find it helps sometimes to put on my employee hat and pretend that I am working for someone else. Selling someone else’s work is much easier than selling your own. Treat your customers’ as you would like to be treated in a store. Always greet a customer as soon as they come in. Open a dialogue with them by asking them a question (and make sure it’s not a yes/no question). Smile – smiles are free. Make eye contact with the customer. Pay close attention to your posture and body language. Stand tall, shoulders back and radiate confidence! Nothing says “I’m new and feel weird about charging for my work” than a seller who’s squirming, looking at her feet and whispering in a shaky voice. Don’t cross your arms in front of your chest – it signals that you are closed. Speaking of stand tall, stand up. Days are long in a booth and at some point you will need to sit. Use a bar stool to perch on. Never sit on a regular chair as you should always be at eye level with the customer.

Before you go to your show add up how much this show is costing you per hour. Add the booth cost, transportation cost (gas, parking), staff cost (if you’re lucky enough to be paying someone), and any other costs you incur just to be at the show. Now divide this by the number of hours the show is open. This gives you the cost per hour of the show. When you’re standing in your booth always remember this number. The OOAK costs me $40/hour. It’s a very expensive show. I do not pay $40 an hour to read a book. And I am totally shocked by vendors you read in their booth! I pay this money to make money. Whenever I start to feel tired, I focus on just “working” for one more hour. I think of spending that $40 and challenge myself to sell double that amount on the next sale.

Speaking of reading a book, leave the book at home. Nothing tells a customer that you are uninterested in them like ignoring them. More don’ts - do not listen to your ipod. Do not hold long personal conversations on the phone gossiping about other people. Do not ever complain about how lousy the show is. No matter how badly you’re doing, when someone asks how the show is, it’s great!!! Do not do your nails, fill out paperwork or do the crossword. I had a neighbour once you fried bacon on a hibachi in his booth. Wrong.

As much as it’s nice to have someone help you out if you’re really busy, if it’s not super busy tell your help to take a walk. Two people in a booth is the kiss of death. Two people present a united front and a lot of customers won’t break into the circle. One person is approachable. If you do have help make it female help if you sell jewelry. A female customer is much more likely to ask another woman if the necklace makes her neck look fat rather than ask a man’s opinion.

Always bring a bit of work to do if it’s not busy. There’s always lots of downtime in a booth, make it productive. Remember, what we do is magic to non-makers. Share it. If it’s not busy try rearranging your booth, or dust it. Brainstorm on how you could display differently. Sketch new designs. Focus on the business. Network with your neighbours and ask them what shows they do. Check out other booth designs.

The more you work your booth the more you will sell. And much as we love doing this for the joy of creating, it’s the sales that drive a business. So put on your Sales Manager hat and go and sell.

Friday, November 26, 2010

Inspiration Friday

If you would like to participate in our Inspiration Friday posts and get some free publicity...Come on people - free publicity is good!  It really can be anything at all, as long as you were inspired from the post to make something. It should be new.

Once you've got it made, send us a picture and we'll post it here. Submissions should be sent to info@beadfx.com with the subject line "Inspiration Friday"  There is no timeline, so please don't worry about trying to complete it within a week.  If you have a blog, or an etsy (or similar) site - we'll post a link to your site if you wish.

I just realized that last week I forgot to include a new Inspiration pic. I know that everyone is going to be crazy busy over the next few weeks. Instead of our regular inspiration posts - Why don't you show us some of the projects you're working on to give as gifts? Or part of your holiday line?  Let's see what you've got!


Season't Greeting to All.

Thursday, November 25, 2010

Happy Turkey Day

To our American friends of course! And with it, comes the long weekend of shopping - Kicking off tomorrow with Black Friday. What that does mean for those of you who are 'making' most of your gifts this year, is you need to get busy! Avoid the crowds in the malls, hunker down with baked goodies, your beads, tools, and see if you can get at least 5 people crossed off your list.

Check out the cupcake blog for some delicious treat recipes

If you've got one of our Bejewelers, whip up a few Swarovski embellished holiday cards, or handmade tags to go along with your gift.  These tags featured on Design Sponge would look adorable with a few little ones added on.

Wednesday, November 24, 2010

Inspiring your kids

Dwyn posted on Monday about giving handmade. It's meaningful, certainly comes from the heart, and gets us into the whole spirit of Christmas/holidays. Children of course want to be involved - and we all know that dragging them out to the mall is painful at best. Inspire the handmade ethos in your kids, and get them started on some crafts to make for their friends, teacher's, grandparents - and of course you!

If you would prefer not to get a beautiful pasta necklace - Take a look at the site with your kids:

http://recycledcrafts.craftgossip.com/

There are a ton of beautiful, budget friendly ideas that would make fabulous gifts. As  the weather gets colder - keep them busy afterschool planning for the holidays.  Don't forget - baked gifts are always a hit!

Tuesday, November 23, 2010

On a Good Note

We want to end the year on a good note, so next month, beginning December 1, we are bringing back some of the old favourites, as well as a few newbies.

Back by popular demand is the 3-D Snowflake Extravaganza on December 1 with Maria Rypan. They make excellent gifts, excellent Christmas tree ornaments.
You've been putting it off. You've admired your friends jewellery and you want to learn how to make yours. The Basic Bead Stringing Class on December 4th will make a perfect start.

Metal Clay is fun. It's even more fun when you are doing it with your kids. The Parent and Child Metal Clay Class let's you do just that. Coming up December 18th.

There's more fun stuff in December. Take a look!

Adios Amigas and Happy Shopping!

Monday, November 22, 2010

Christmas is Coming - Time to Start Panicking

Well, actually - not. Let's not have a panicky, last-minute, rushing-around-like-a-chicken-with-it's-head-cut-off holiday season.

Oh, and btw, yeah - they do run around after you, uh, decapitate them. If they happen to land upright. For a surprisingly long time. Rural experience - many years ago. Aren't you glad you asked?

So, with the big holiday season only a month away, wouldn't it be nice to slow it down for real this year, instead of just talking about it? Let's skip the commercialism, and use the season to tell the people around us that we appreciate who they are and what they do the other 11 months of the year.

And one of the most profound ways to do this is to give a handmade gift. Now, I fundamentally believe that the ability to be creative and make things is well within the capability of anyone - especially as the whole phenomenon of buying absolutely everything is fairly recent in our history. And I'm pretty sure that if you are reading this, you are more capable than most, because - well, we are a bead store and making stuff is our "thang." So you are already hooked into the hand-made mindset.

So the key here is not to aim so high that you fail hideously - but to make yourself a series of obtainable goals. Divide your list up by the length of time you will need, and work backwards to know when you have to start. Yeah - I know - when I say it that way - you know it's obvious. But sometimes it just takes someone stating the obvious.

The other thing you are going to do with this year's handmade gifts is you are going to write a nice little note to go with it that explains it. Because a lot of us have lost the habit of giving handmade, the person receiving it may not really understand why you made that choice, so here's the solution -tell them.

Tell them why you choose to make what you did, and why they are getting it, and something about it. Tell them about what is it made of, and perhaps something about the history or how you learned to make it.

Or, if you choose to buy handmade, tell them why you selected that item. "It makes me smile and I hope it does the same for you too." "I noticed ______ and thought you might appreciate/be able to use/get a laugh out of this."

So that way, they understand why you picked what you did. Then they really will get "the thought that counts."

Because life is too short to not appreciate it. It's too short to not appreciate the people around you, and ultimately - all we will have are memories - so let's get out there and make some!

Sunday, November 21, 2010

The Joy of Metal Clay: More about textures...

Last week I talked about the abundance of textures you can find in life. This week, I realized there was more to say about textures.


I had a conversation with an individual new to metal clay who was astounded that simple rubber stamps such as those used for scrapbooking and other stamping tasks would work on metal clay. Yes it is true.

People use rubber stamps found in craft stores and there are even great little stamps often found in dollar stores too.

Many people who have discovered metal clay have fallen in love with the abundance of rubber texturing stamps on the market today. Over the past few years there has been an increase in stamps marketed to the metal clay community, and we are seeing many artists designing and selling stamp specifically for metal and polymer clay.


There are many places where you can buy texturing stamps. Here some places that have been around for a while. They are actually the companies that I bought my first collection of stamp from:

I know there are many more places now...so feel free to add your favorites.


Since my first foray into purchasing texturing stamps, several Canadian resources have become available. Here are two:
  • Shades of Clay - a Mississauga based company catering to the polymer clay (and metal clay) enthusiast!!!! They have a great selection of tools and of course textures. Be sure to check out one of my favorite series of textures by Helen Breil.
  • Another source of metal clay texture sheets comes from one of my former students and fellow artist Liz Stenson, she has a series of textures sheets you can check them out at Lady Muck Designs. Check out her watch parts texture sheet...I have one that I hope to play with this week.


Now buying textures is a quick and easy; but many artists want to make their own textures to create that truly unique piece that is all theirs. There are many ways of doing this (photopolymer sheets, linoleum,....) . One relatively quick and easy way is to send a black and white graphic image to a stamping company to have your own custom stamp made. Over a year ago I searched and search for a company to do this for me. (It was actually hard for me to find a company that would sell unmounted rubber stamp.) I finally found a company called RubberStamp.net


I was very happy. I made a name stamp to mark my pieces and several custom stamps.


Feel free to share your resources.
Enjoy!

Heather

Saturday, November 20, 2010

The Business Chat - the 10% rule

At 2 a.m. last night I finally turned off the lights in the studio after a really long long day. Why was I working so late? Well I was having fun, however it is also 3 days before move in for the One of a Kind craft show. The One of a Kind show is a juried art show of 800 vendors, it takes place on November 25 – December 5. Yes, that is 11 days, 11 hours a day. It is a BIG deal. And I have left too much work until the last minute. Again. As I was discussing with a fellow artist (at midnight last night) who is also doing the show for the 8th year, why are we stressing about this so close to the opening date? Should we not know better? We aren’t newbies anymore. And this is my post for today.

It doesn’t matter how long you’ve been doing this, you will still stress about a show. You will still stay up too late working in the days prior to a show. You will still not know what will sell and make a guess, although now at least it’s an educated guess for me. For those who are doing their first show, or their fifth, take a really deep breath and just keep moving forward.

A large part of the uncertainty is working out inventory. The tricky part of selling to the public is trying to predict what the public wants. At this time of year people are shopping for gifts in quantities, this means that they are looking for lower priced items. In June a customer will approach me asking for a bracelet for her sister. In December that same customer will approach me asking for a $30 present for her sister. Everybody is on a budget, if you have work in a broad range of prices you will appeal to more wallets.

In my business workshops students always ask, how much work do I make for show? Unfortunately, there is no magic formula. What I can tell you is that there is a rule that we can use to help judge our stock. In the jewelry industry we have the 10% rule.
The 10% rule tells us that our booth cost should be 10% of sales.
For a $25 show, you should sell $250. A $250 show, sales should be $2500. It doesn’t matter if your $100 show is 1 day or 3 days, if the show costs $100 you should sell $1,000. Keep in mind - this 10% is an average not a guarantee. Do not expect to make the 10% in your first 5 shows because as a newbie you will make mistakes. On your first show be happy to break even (including ALL your costs not just your booth fee). In the next 4 shows you should see your sales improve as you work out your display and show techniques. Now start charting your show sales. Sometimes you will do a $25 show (expected sales $250) and make $500. Bonus! Then your next show might be a $75 show and you sell $500. Booth costs = $100, sales = $1,000, average = 10%.

Knowing this rule does help with inventory. If you are doing a show that costs $50, you can expect to sell $500. If you expect to sell $500 there’s no point stressing about bringing $8,000 worth of work. Every piece of jewelry you make costs money to make. If you don’t have reasonable expectations of selling it, this inventory is going to end up sitting on your shelf. That’s money sitting on a shelf instead of in your bank account.
A good starting point is to bring 2 or 3 times your expected sales. If you expect to sell $500, then bring $1,000 or $1,500 worth of work. Over time this will increase and you will be carrying around 4 or 5 times expected sales. It takes time and money to build an inventory. If your costs are 25% making $5,000 worth of inventory costs you $1,000. Spending $1,000 to go to a show where you sell $500 isn’t a great idea. Yes you still have the leftover inventory so if you are doing a couple of shows in a row you might be okay. It is still a better idea to make $1,000 - $2,000 to start, sell some, make a little bit more, sell some, and so on.


So now you have a rough idea of how much to bring. Take a deep breath and go and make it. I’m going back to work.

ps. Anyone in the Ontario area if you’re visiting the One of a Kind show, I’m in booth W38. Stop by and say hi!

Friday, November 19, 2010

Inspiration Friday

If you would like to participate in our Inspiration Friday posts and get some free publicity...Come on people - free publicity is good!  It really can be anything at all, as long as you were inspired from the post to make something. It should be new.

Once you've got it made, send us a picture and we'll post it here. Submissions should be sent to info@beadfx.com with the subject line "Inspiration Friday"  There is no timeline, so please don't worry about trying to complete it within a week.  If you have a blog, or an etsy (or similar) site - we'll post a link to your site if you wish.

Judy Lovell sent us a fabulous bracelet this week - entitled Dolly. Have a look! Also be sure to check out Judy's blog


I'm still on a bit of a polymer kick. While I had a lot of fun making the steampunk hearts - it's not really my style - I thought I'd play a bit on my own. I was particularly inspired to create some weathered looking pieces. I even found a silicone mold I made a while ago of some coral. These made awesome little 'lichen' inspired stones.

I haven't yet sealed any of these, as I'm not sure yet what to use. Any polymer experts out there? I don't want them to be glossy - and prefer a matte look with these.  On one of the rings, I used Helen Breils texture stamp.  These are so, so much nicer than my first attempts at polymer clay. And then of course I discovered Polymer Clay Daily. Good G*d - there are some insanely talented people out there. If any of you have snobbish attitudes towards polymer clay...You won't for long.  Wow, Wow, and Wow....

I recommend checking out that link when you have time to kill. Seriously, there is so much incredible eye candy....You're about to lose hours!

And so I present you my very humble polymer clay beginnings.


Thursday, November 18, 2010

Need Packaging Ideas?

I'm sure all of you are busy preparing for the holiday season - and the jewelry you've made - or are planning on making. But have you thought about how you're going to package it? You've gone to a huge amount of work to create something stunning - I hope you don't plan on sticking it in a zip lock bag :-)

I discovered this flickr group today - Short on ideas? Check out all of the creative packaging ideas here.

Wednesday, November 17, 2010

Fun with watch parts

I've had my little baggie of watch parts for a couple weeks now. My original plan was to make some sort of a resin project. However, the other day I ran across a free tutorial by the awesome Christi Friesen. Some of you may have seen her books. We've carried them on occasion.  Once I saw her tutorial for a steampunk polymer clay heart...I knew I had to try it.

Some of you may remember me mentioning that any of my attempts at polymer clay in the past - looked....well, like something done in kindergarten class...at best :-)

This time, I followed instructions! I'll readily admit to not always following the directions. I'm a skimmer when it comes to reading instructions. I'll go back and read them fully, only after I've messed up the first time. This time I read them...quite proud of myself really ;-)  I had such a blast making the hearts....And they look OK!

The only thing I modified from the directions was the clay. She recommends Premo clay, but the only clay I had on hand was Kato. I found the Kato took a really, really long time to condition. Next time, I'll pick up some Premo, which I think will be much easier for this newbie to manipulate.

I now can't wait to try some of her other tutorials. The puffer fish look awesome!  Go have a peek at her site. Awesome stuff!

Here you can see my attempts at her steampunk hearts.

Monday, November 15, 2010

Play Days, Clay Days and Classes

First of, November 28th is the next Play Day at BeadFX. If you've never been to one of our Play Days, you should drop in for this one. At least once a month, art clay enthusiasts congregate in our classroom (all new and renovated by the way) to play with clay and chat with the rest of the bunch all for $10. You have to bring your own art clay though. We'll provide the rest of the fun. For our regulars, Heather (a.k.a finesilvergirl) is going to be there.

This class sold out at the Toronto Bead Society Fall Fair, and Nadine Foskin is now presenting it at Beadfx. It's called Flowering Branches. I will recommend this class to anyone looking for variety and flexibility. You will be using pearls, dagger beads, glass leafs, etc to create a multi-purpose piece of jewellery. Use your finished piece as a brooch, or a pendant, or hair ornament.

There are more classes. You only need to click here to see them all.

Adios Amigas!

The Climbing Price of Silver

If you listen to the news, either TV or radio, you may have noticed that the price of silver has been shooting upward. Like a rocket.

Bad news.

Because an increase - especially a dramatic increase like we've seen recently - translates into more expensive silver beads and findings. Sterling silver, fine silver, silver metal clay, and even the silver plated items - will all be going up.

So - what's causing this increase in silver that we will be having to pay for? Did Peru and Mexico suddenly shut down all their silver mines? (Peru and Mexico are the two top world producers of silver.) Is there some massive plot to control the weather by seeding clouds with silver iodide to produce rain that is causing governments to buy up silver to restrict access? (Silver iodide is what is used in cloud seeding.)

Ha!

Googling for silver prices reveals that most of the hits on silver have more to do with investing than jewelry. And herein lies a clue.

From what I can make of some of the reports I have found, a general fear of inflation is causing some people to buy gold and silver. Thus driving the prices up. Which, isn't that the definition of inflation?

However, a reliable source inside the investment industry has opined that this is an adjustment that is long overdue to bring the price of silver back in alignment with the price of gold. Historically - they have a well-defined price-relationship.

Now, I have no problem with gambling as entertainment - which some folks like call "investing" - but it isn't. Wired magazine recently reported "one of the big trading firms just announced its average hold time on a stock was 11 seconds." I concur with the assessment that follows - that's not investing - that's gambling.

But what this gambling on the price of silver means to you and me is that: we're are already paying more for silver, and our suppliers have increased their prices - some by 30%.

So - sorry - but if we don't match those price increases - we can't afford to restock - so silver will be going up. We do expect to see more white metal alternatives coming along soon - and we will be picking them up if we think the quality is decent (and that they aren't made of something nasty, like lead). For instance - I have a box of zinc beads here to process. That should be interesting.

In the meantime, you might want to participate in a little gambling of your own, by buying silver now for use later - hoping that the price will continue to rise and you will feel smug every time you put a sterling toggle on a bracelet. Or maybe you'd prefer to sit tight with what you have, and hope that the late Friday downtick in the silver price turns into a trend?

Or perhaps you can cultivate a fondness for copper jewelry instead?

At least - it makes the price of all that over-the-top crystal stuff I design look reasonable!


-----
References:

Gold and Silver Rally on Rising Inflation Expectations
Wired, November 2010. "The Big Score", pg 173.
Kitco.com

Sunday, November 14, 2010

The Joy of Metal Clay - Texture


One of the things I love about metal clay is its ability to take texture. There are tons of textures out on the market and many things you can use to texture your clay. After I took my first metal clay class I found myself thinking about all the things that I could use to texture my metal clay.


This past week our Metal Clay Group had a visit from Helen Breil a polymer clay artist and designer of fabulous textures. She spoke to our group about ways to make our own textures using polymer clay. She offers tutorials on creating your own textures at her website.


Here are some other easy ways to texture you can texture your metal clay (here I test the textures on some plasticine, yes I use other clays to test out textures as to not dry out my silver clay experimenting):


An onion bag and metal screening


The edge of a piece of lasagna...


Rice

(You can leave rice or the alphabet pasta on the beginning photo on the clay as it will just burn out in the kiln)


Just a screw


How about a screwdriver


There are endless possibilities. Look around, leaves, bottle tops, buttons and more. Fabric, lace, wallpaper, ribbons, even fancy papers...(I will use spray acrylic on some papers to preserve it and allow it to stand up a better)


Take a piece of cardboard and a hot glue gun and drizzles a crazy pattern, let it set and there you go.


Carve an eraser, linoleum.


Go crazy and have fun!!!!


Saturday, November 13, 2010

The Business Chat - Raising prices

I think silver wholesalers need to install defibrillators in their shops for all those heart attacks that happen when shoppers look at the current prices. People, have you seen what happened to silver in the past month??? And could the timing be worse? Seriously, right before the holiday shopping season? ARGH! What’s a jewelry designer going to do? Are you raising your prices or not? This was the major topic of conversation in the aisles last week as precious metals hit record-breaking highs.

The bottom line is that in order for your bottom line to be healthy, or at least above water, you are going to have to raise your prices. Raising your prices is not pretty or pleasant yet the state of the world economy is not your fault and you should not lose money because of it.

As the holiday shopping season is just beginning I suggest that now is a good time to go over all your pricing and adjust where necessary. If you are using precious metals your prices will need to be adjusted. Upwards. All of them, not just the pieces that you make with your new expensive metals, all the pieces in your inventory regardless of what you paid for the metals.

Here’s an example. Lisa makes a lovely charm bracelet of crystals and pearls on a heavy silver chain. 2 years ago she thought of this design and purchased silver chain for 4 bracelets paying $0.85/gr. She finally made these bracelets last month and liked them so much she decided to make more. She purchased silver chain for 4 more bracelets last month (when the chain cost $1.15/gr) and still needs to make 4 more before her craft show next in 2 weeks. The silver chain now costs $1.45/gr. Each bracelet uses 12 grams of silver chain. 2 years ago the cost per bracelet for the chain was $10.20. Last month the cost per bracelet was $13.80. Today it is $17.40.
Translating this into a retail price (using your pricing formula) 2 years ago her retail price was $90, a month ago it was $101.40 and today it is $112.20. Lisa needs to charge $112 (stupid number, round down to $110 or up to $115) for all of her bracelets.

“But that makes my pieces so expensive, people won’t pay that! I can’t charge that much!” wails Lisa. Yes Lisa they will. People do understand that the price of raw silver is beyond your control. Metal is expensive. You can post a notice on your blog/website/newsletter informing your customers that your prices have increased due to the rising cost of silver. You can rethink some of your designs and see if you can use less silver or change to a cheaper metal (such as copper). What you cannot do is continue to price your work using outdated prices. That will sink your business and you won’t have to worry about this problem next year because you won’t be in the game.

“What if I charge $90 for the ones made with the older silver and $110 for the newer ones?” reasons Lisa. I actually heard a couple of makers discussing this as a viable strategy. As a customer I come into Lisa’s booth and see 2 bracelets that are almost identical (same design different colours of crystals). One is priced at $90 and one is $110. I ask her what the difference is. “Well, the $90 bracelet is made with metal I purchased 2 years ago.” Now as a bargain-hunting customer all I want to see is the old work you’ve got. There’s no point in even showing the new expensive work. And you know what this starts to feel like? Flea market.

“But I can’t charge the new price for silver I bought cheaper!” exclaims Lisa. Yes Lisa you can. Think of this as the interest accrued on your investment. For investing is what you have done. What if 2 years ago you had bought a bar of silver as an investment? Now you could sell it and make a profit. Instead of buying a bar of silver you bought finished chains. This is called business. What if instead of buying that silver chain you had put the money in the bank and collected interest? (OK bought stock or something that actually pays interest). Your money would have grown. Inventory sitting on your shelf is an investment and you are entitled to make a profit on that.

Lisa has also listed her bracelets online based on the original price she paid for the chain. “Well, I’ll just keep the ones online at the old price and sell the new ones at the craft show for the new price.” Wrong. Nothing is going to annoy a customer more than to buy a bracelet from you at a craft show and then visit your website to see what else you have and see that it’s cheaper online. Pricing must be consistent across the board. You set your online prices. If they need to be increased then do so. Stores raise their prices all the time. You can too.

Raising prices isn’t a pleasant task however sometimes it just has to be done. If you are selling your work you are a business no matter how small. Not paying yourself properly shows a lack of respect for your work. If you don’t respect yourself and your work, why would a customer?

Friday, November 12, 2010

Inspiration Friday

If you would like to participate in our Inspiration Friday posts and get some free publicity...Come on people - free publicity is good!  It really can be anything at all, as long as you were inspired from the post to make something. It should be new.

Once you've got it made, send us a picture and we'll post it here. Submissions should be sent to info@beadfx.com with the subject line "Inspiration Friday"  There is no timeline, so please don't worry about trying to complete it within a week.  If you have a blog, or an etsy (or similar) site - we'll post a link to your site if you wish.

So last week was a complete write off for me, and this week I got a little distracted playing with patina's, making more earrings based on some earrings I made for a previous inspiration Friday, and my labradorite inspiration this week. I just didn't have time to work on anything else. Fortunately, we do have a couple of submissions to show you!

Amelia M made this lovely necklace. You can see more of her work on her etsy site.


And Jeannie sent us some handmade beads:  You can visit her on both etsy and artfire.


And for next week - Lichen!

Morning Light

Thursday, November 11, 2010

Ottawa Glass Bead Artists Show

Love lampwork? Well you need to get on down to Ottawa this weekend. Perfect excuse for a little mini vacation if you ask me. I'd be packing up hubby and the kids for a last minute vacation if I wasn't going to be traipsing through Pickering on Saturday in the Santa Claus Parade - Yes, in the parade :-)  My girls are both in the parade this year....I've got 2 days to come up with a costume for both...

Anyway, back to the fabulous beads... We'll be there, but with a small booth, and probably just a small selection of products. Sending all our beads to Ottawa isn't very practical - but come and say hi regardless!

Bead & Jewellery Show 2010


Friday November 12th, 4-9pm

& Saturday November 13th, 10-6pm 2010

* A Showcase of ‘Hand Made’ Glass Beads , Jewellery & Bead Work *

Venue: Hellenic Centre, 1315 Prince of Wales Drive
Ottawa, Ontario

Salon annuel de perles et bijoux  2010
Vendredi le 12 Novembre, 16-21hr
& Samedi le 13 Novembre, 10-18hr 2010

* Une 'vitrine' de perles de verres faites à la main, bijoux et travaux de perles *

Wednesday, November 10, 2010

Patinas

Heather's post the other day reminded me that I bought a patina tutorial and solutions from MissFickleMedia - Shannon is the queen of patinas!  I have also tried the ammonia, and ammonia/salt combination with very little luck whatsoever.

However with the patina solutions I got from Shannon - well just take a look!  Blue/green verdigris starts to develop in minutes, and within 24 hours...wow!  She's got lots of other colours as well.
Here I've used persian indigo, and traditional verdigris.


The patinas will only work on pure copper/bronze/brass etc. They cannot be plated at all. If you do go ahead and purchase any of the patina's - be sure to get the tutorial as well. Some are applied with heat, others not.

In other news, I'm back on track with my posts this week, including the Inspiration Friday. We have a few submissions that we missed last week.  Sorry - it was just one very, very busy week.

Next Week in Classes...

At beadFX, we always have a ton of classes because we know you're always looking to learn something new. Next week is no different.

For metalworking enthusiasts, try our Basics of Soldering class on Nov 17. In this class, you'll learn, well, the basics of soldering. Topics covered include: soldering a butt joint, soldering a long seam, soldering a small item to a large item and how to solder a jump ring.

Coil and coil away on Nov. 16 with Rae Huggins. Isn't that pretty?


Finally, are you a lampworker looking for a new challenge? Try the Sculptural Angel Workshop on Nov. 20. Oh, and the Holidays are almost here, imagine how beautiful that would look on a tree, or on top of a fireplace.


Adios Amigas!

Monday, November 08, 2010

Inspired InStyle


InStyle magazine is one of the few fashion publications that I buy with any frequency - and that is only because they usually have a minimum of 3 pages devoted to jewelry. This particular issue was a hum-dinger however, with a whole whack of inspiring ideas.

I was uber pleased to see big rings, big bracelets and lots of jewelry in general. Not because I actually care about fashion - "Really?" - those of you who have met me would say, "I would never have guessed!" Careful putting your tongue that far into your cheek - it might come right through! Anyway - I personally don't give a rat's patootie for the dictates of fashion - but I'm always pleased to see people wearing jewelry I like and admire. (Hey - is that not a really wonderful necklace on whosis on the cover? Wonder if I could make something like that ... )

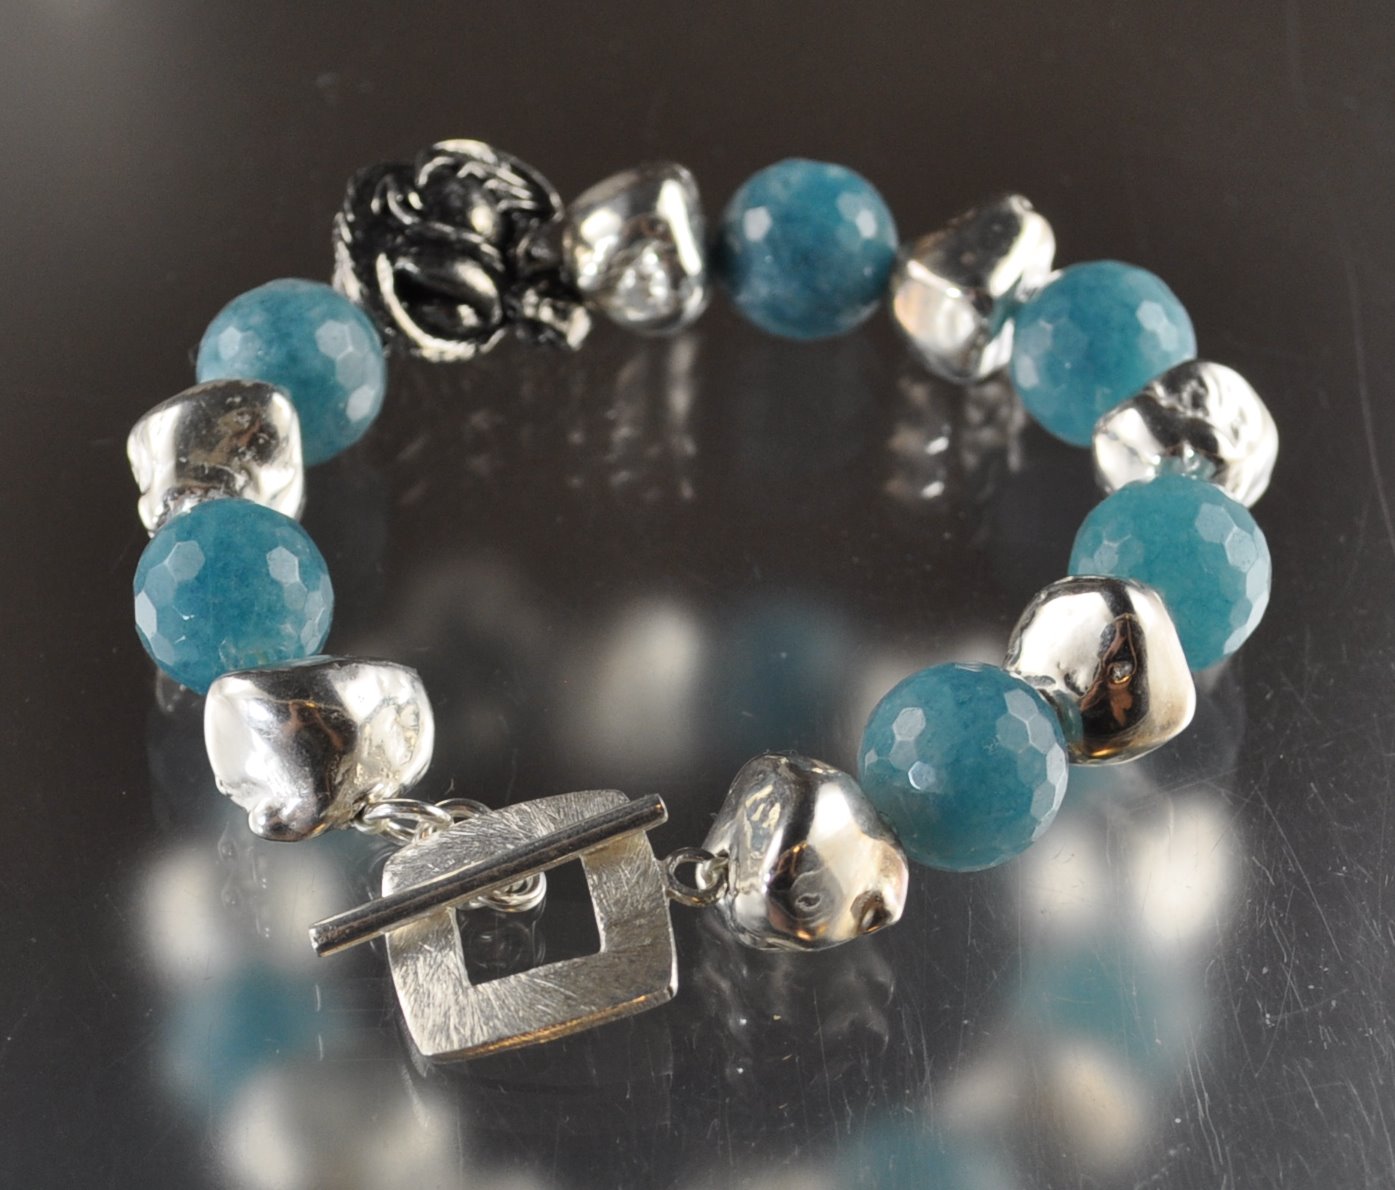
s26872 Stone Beads - 16 mm Round - Angelite (1)The point is - there was LOTS of stuff in this issue what was totally up my alley - and so, armed with some of the Angelite from last week's update - which was also just too beautiful to pass on - I decided to actually try and make or adapt some of the designs I really liked.

This dangling earring with the big bead at the bottom, looking bottom heavy and like it swings like crazy - just really appealed to me. Yeah - you need a long neck to carry off the long earrings.


So here's my take on the earrings. A headpin, a long brushed silver tube (from my stash) and the bead at the bottom.

(If you are looking for the tubes, the store appears to be sold out of the really long ones, the shorter ones are on the site - or maybe some bugle beads, or a piece of chain?) Metal Beads - 10 mm Slender Tube - Brushed Silver


Next up - these armfuls of wrist candy impressed the heck out of me - pile on the scrumptious, stone bracelets! Also digging that tassel - top right.

Whoa dude - there's that tassel idea again.

So here's my take on that - brushed silver beads, a handmade chain tassel, and Angelite beads.

Notice how I used the big square beads with the open centres? Also the smaller donuts, again with the big open holes. Kewel, eh?


To make the tassel - take some thin wire, about 22 gauge. Thread the end link of a piece of chain onto the wire, and measure about 1 inch. Cut the chain, and put the next link on the same wire, and measure against the first piece, and cut the chain again. Repeat - until you have a nice full tassel. In this case, I deemed that 15 looked pretty good. Especially as I used sterling chain. I suggest using a silver plated chain to keep the price down.

The ragged edge from the imprecise measuring looks nice. It fans out and looks like it was deliberate. Which it was. ;-)

Twist the wire around itself and secure and trim one wire, and then put the other wire up through a bead cap, and make a wrapped loop on the top of the bead cap. Et voila - a tassel!

These sterling pebbles with the Angelite look fabulous, and the dark bead is a dragon shaped bead that a friend brought me back from a trip.

Normally I love copper and turquoise - these copper pebbles and the Angelite - not quite sure about this - but hey - beads are about as recyclable as it gets, and I can always take it apart and do something else!

Hey - look - another pair of earrings popped out - just 'cuz.

Big juicy rings are such fun! They are playful and don't have to be taken too seriously! Jen's Bird's Nest ring technique adapts wonderfully. Thread the bead on your wire (About 6 feet of 22 gauge) - and take the bead to the center, folding it in half. Pull the two wires down through a monster bead cap, and then separate and proceed with making the ring. (The bead cap was from my stash from a looooong time ago.)

A few Pacific Opal Swarovkis complement on the side - the colour is very close to the Angelite.

All in all - a goodly haul of loot. Not bad for a strand of beads and a magazine!


Go here for the brushed metal beads.

Sunday, November 07, 2010

The Joy of Metal Clay: The final pictures of the Bronze Patina


Last week, I talked about using ammonia to patina bronze.


Here is the final photo after 7 days over the ammonia fumes. I am not very happy with it to be honest. Still, I didn't achieve the rich turquoise I had hoped for. Perhaps another few days might have worked but I am not sure. In my reading some people suggest using salts to help enhance the colour (perhaps that is a solution, although I have been able to get the blue without the salt on previous attempts, I wonder if the ammonia's strength decreases over time, the bottle I used is over an year old???).

My approach to life is if you don't like something change it. So I took my brass brush and some water and brushed the pieces vigorously to remove some of the patina. Voila, a nice antiqued bracelet.


I am satisfied. But have many questions and will try working on the turquoise another time. There are so many things that can be done. Working in metal clay is never dull or boring!!!

Enjoy!

Saturday, November 06, 2010

The Business Chat - Shipping

Yay! Someone clicked the Add to Cart button on your website/online store and purchased your fabulous earrings!!! Congrats!!! Now, before you run off to celebrate you still have work to do. You have to get those earrings to their new owner. You have to ship your product.

Of course it won’t be that much work because before you listed those earrings you thoroughly researched how to ship, what packaging to ship in and how much to charge for shipping. And of course you posted all of this online or in your booth (where you took an order for the earrings). The customer is well aware of how much the shipping is and how long it will take. All that you have to do is put the earrings in the package and mail them out.

Since the busiest buying season is gearing up and the orders will soon be flocking into your inbox let’s talk about how to get those products out the door in an organized and lucrative manner.

The actual cost of shipping
How much does it actually cost to ship a pair of earrings? Or a heavy necklace? Or (fingers crossed) 5 items? To calculate this, put together several sample packages and visit the post office or their website. Use a variety of addresses, I used BC, Nova Scotia, Florida, California, England and Australia. Go on, dream big and imagine your jewelry shipping all over the world. Put together a sample package of a small item such as a pair of earrings, another package of a heavy necklace and a package of several pieces. You don’t have to use the post office; there are also courier companies such as UPS, Fedex or DHL. While you’re researching investigate all options.
While most companies (including Canada Post) have their rates listed on their websites, I found it easier to go to the office and have them weigh it and tell me the options. Sometimes they have information or suggestions that aren’t easily found online.

Packaging for shipping
For the most cost effective shipping you may need to reconsider your packaging. In Canada, using Canada Post, there are height and weight restrictions. If the envelope is higher than 2 cm it is considered a parcel (much more expensive). So a package containing earrings in a box is called a parcel, the same earrings in a gift bag can be mailed as a letter. As cute as my boxes are the extra $6 in shipping costs isn’t worth it for me, and all my items are mailed out in gift bags. Whatever you use to ship in, make sure it will protect the items. On a suggestion from my local post office, I never ship a package with my company name on it. I use my personal name and handwrite the address rather than use a label. Why? Because it is less likely to be stolen. And it works.

Insurance
Insurance is to protect you, the seller. Shipping is an aspect of customer service, and in the event there is a shipping problem, you may face an unhappy customer. Consider purchasing insurance on big-ticket items, or adding a small amount to each item cost so that in the rare cases where packages get lost, you have a fund that can cover you.
You can find out the cost of insuring your package from your postal service. Some expedited services have certain insurance packages built in, so look into that before buying additional insurance. Keep in mind that insuring a package will cost, so if you are offering this as a free incentive you must remember to build the cost into the price of the jewelry. Another tip, courier companies will not insure jewelry when shipping internationally. They will however insure fashion accessories.

International shipping
If you are shipping to another country, you'll need to include the proper customs documentation. Do not mark it a "gift" if you're mailing an item you've sold to a customer. Check with your country's postal service to find out exactly what forms you'll need to attach to your package. Theoretically, filling out these forms thoroughly should prevent your package from getting held up in Customs.
Shipping internationally will go smoothly most of the time. Every so often a package can get stuck in customs. Make sure your customers are aware that you can't be responsible for these delays. It's nearly impossible to track a package once it leaves your country. The buyer is responsible for any additional fees that may be charged at customs, make sure you add this to your Shop Policies page.

When in Canada for U.S. and International Xpresspost and Expedited parcel services, fill out the 'Customs Declaration' section of the shipping label. For U.S. Small Packet/Light Packet, CN22 Customs Label (white for SP, green for LP). In the USA you'll need a green CN 22 customs form which you can pick up at the post office or order for free from usps.com.

To charge or not to charge – free shipping
And the most important question, what should you charge for shipping? Or should you charge at all? Many new sellers automatically offer free shipping thinking that will be a great incentive to new customers. Free is always good, however free isn’t always good for your bottom line. If you sell a $15 pair of earrings that you ship in a box and your shipping cost is $8, offering free shipping means that you will lose money.


Let’s use Judy as an example. Judy is just starting to sell online. She has made a pair of earrings and wants to list them. The earrings cost $4 to make (including the box she packages them in), her labour cost is $4. Judy doesn’t intend to sell wholesale or on consignment, so her retail price on the earrings is a minimum of $24. Note that this price doesn’t include shipping costs. If Judy want to include free shipping she must add the actual shipping cost to her cost of materials. When Judy visits the post office to research shipping, she finds that to ship her earrings in a box and bubble wrap envelope the cost is $8. The same earrings in a gift bag ship for $1.22 (plus the bubble wrap envelope). If she wants to ship for free, her earrings (in a box) must be listed $48. To ship for free in a gift bag, the earrings will be listed $30. Best for her to repackage in a gift bag, list the earrings at $24 and charge $2 for shipping.

A huge mistake most new sellers make is to downplay what people are willing to pay and give away the farm. Not charging for shipping means that you are willing to lose part of your profit. Oh and also not charging for shipping packaging. I know that mailing envelopes are cheap but they aren’t free. It’s called Shipping and Handling, when you buy online from large companies not only are you paying for the envelope, you are paying the labour costs of puting your your item into the envelope, filling out the address label and licking the stamp.

While Free Shipping may seem like a great option it is generally not cost effective on lower priced items. And it is never cost effective if you haven’t built the cost of shipping (and shipping packaging) into your price. Don’t pay too much attention to what other people are doing, just because someone else is willing to lose money this holiday season doesn’t mean you have to follow. Do your research, crunch your numbers and come up with your company shipping policy. Once you know what this is, tell your customer. Inform them on the front page of your web site how much shipping costs. Tell them how long shipping takes. Tell them again in each item description and on the shipping policies page.

One last tip.Do your online customers a favour and let them know your holiday shipping deadlines! What’s the last day that a customer on the other side of the country can order your earrings and expect to receive them before Christmas? (time for another trip to the post office!)

ps: An excellent source of information when shipping in Canada is Canada Post’s ABC’s of mailing.

Friday, November 05, 2010

Delay in posting

Sorry for my lack of posts - unfortunately, I got caught up with some deadlines. I do have posts coming up hopefully later today, or at worst over the weekend!  We have a submission for our Inspiration Friday post as well.

At the shop, everyone is extremely busy preparing, and packing up for the Toronto Bead Society show. Are you going? What sort of stuff will you be looking for?  Personally, I'm looking forward to a few hours - sans kids, and the chance to catch up with old friends.

Wednesday, November 03, 2010

Wednesday Distractions

It's a perfect day to get distracted isn't it?  As I was preparing to write today's blog - the only thing that kept popping in my head was a missing book, and my need to replace it. Somewhere in my house is a book by Hadar Jacobsen - her 2nd book. You might be wondering how one can lose a book, or misplace it - and still believe you haven't loaned it out to someone...Well, I own a lot of books. Maybe I did loan it out to some one, but more likely it's here somewhere. I also have a tendency to bring my books out. I read them while waiting, while in the car - really, any time I have a spare moment or two.  That said, I can't find it, and I'll need to replace it.

Here is where the distraction part comes in. Some of you know who she is, and the awesome jewelry she creates. In her online shop is an extremely impressive selection of one of a kind jewelry created from her various products - steel, silver, copper, and bronze. Somehow, while I was supposed to just pop over and order the book - 2 hours later, I still don't have the book in my cart...and I'm not done reading through her blog, or looking at her fabulous jewelry.  Pop on over and have a peek - you won't be sorry!

The other thing I'm thinking about is how to get rid of my kids for a few hours in order to visit the bead fair this weekend! This will be my first time ever going as - gasp - a customer!  If you're in Toronto, be sure to try to stop by. It's my all time favourite show here in Toronto!  I'm looking forward to seeing old friends. See you there!

Bead Fair

Tuesday, November 02, 2010

New Classes with Bling!

We have two new classes featuring next week, and 3 other regulars. Check out the Viking Knit and Swarovski class with Laurie-Anne and Beth Clinton. Are you like me, and you've been eyeing the Swarovski cones? This class adds bling to viking knit.

Rae's A Little Bit of Everything class, really has a bit of everything - wire wrapping, loops, coiling, spirals, and more. Plus, the necklace itself is made with a mix of semi-precious stones, chain, tubes and an assortment of glass beads.

And finally, 3 of our regular favourites: Introduction to Art Clay Silver, Introduction to Lampworking, and Wire Working & Wrapping 101.

See our November schedule for a full list of our classes!

Adios Amigas.