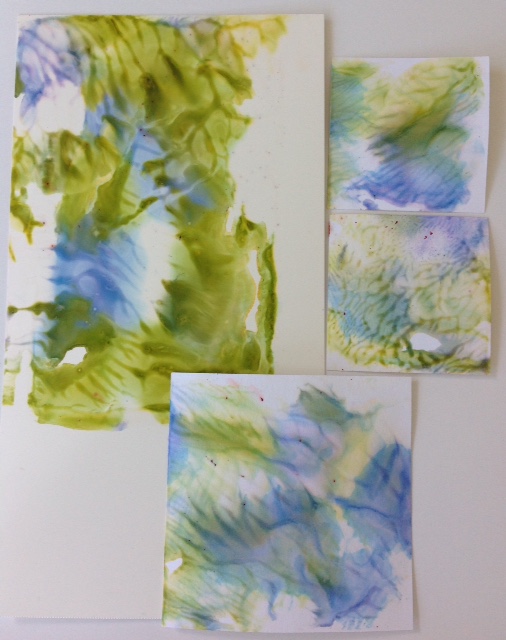
Click here to visit ...

Showing posts with label Iced Enamels. Show all posts

Wednesday, August 03, 2016

The sky's the limit!

Did you ever look at a blank page, and wonder what the heck you were going to write on it? Creativity seemed to leave the building, as your brain froze in terror! Think back to the teenage years? Remember the horror? Similar things can happen, when you’re looking at a pile of beads, or other supplies like empty bezels, white dominos, glass tiles, or metal pieces. What to do, what to do?
The beads can be shuffled around, until you find something pleasing to the eye, but what about the rest of those blank promises? Clues, I know clues! Lots and lots of clues! Wouldn’t that help to fan your sparks of creativity?
Colour and texture are obvious, but how will you use them, and what form will they take? It certainly helps if you’re a magpie like me, and collect all sorts of bits and pieces. But if not, it’s never too late to start your own creativity box &/or idea file! Flip through your magazines, and cut or tear out anything that interest you! Old letters, photographs (copies, not originals), ledger paper, handwritten notes, cancelled stamps, security envelopes, children’s drawings, free or purchased images, commercial papers, fancy napkins, and colouring book pages, should all be fodder for your creativity! Focus on colour, shapes, textures, fonts, and just about anything else! Build yourself a nice, fat, file, and then take some time to sit down and play with your papers! You’ll be amazed at how soon the juices start flowing!
If the muse agrees, create a collage! Then audition parts of your collage, as a background for your piece (perhaps in a bezel, or even a domino). Do you like it? What if you decided to tart the collage up a little with some paint? How about framing it with a narrow layer of Iced Enamels, glitter, or even another collage? What if you included a charm, bead, or some type of natural element? Or how about shrinking a photograph to size? Do you see where I’m going? I’ve started you off with a basic background, and then I’m leading you into building a composition, by suggesting other possible elements.
But wait! You don’t need to limit yourself to paper! How about building a metal or fabric collage? You could even make a stitched fabric & paper collage! The extra texture would be fabulous and the principles are the same! As a self-professed, mixed up media person, I certainly wouldn’t complain! But then again, what about painting or printing (monoprinting, such as Gelli printing) your own backgrounds? Try it with either acrylic paints, watercolour, inks, or even alcohol inks. That would be totally cool and creative!
Play, experiment, and build your composition! Conquer the freeze, open your mind, and explore the possibilities. The skies will open up, your muse will be happy, and creativity will bloom!

Wednesday, July 13, 2016

What's on my bead mat - July edition!

We’re having a heat wave, a tropical heat wave”, so what better way to deal with it, than a long, cool drink, a few beads, and some mixed media items? Once again, I’m all over the place artistically, but that seems to be a huge part of my creative process!
I facilitated two completely different workshops this weekend, and thoroughly enjoyed both, thanks to my eager and talented students! Who knew, when I was living the stressful corporate life, that I would get so much pleasure out of sharing my creativity? I always knew that there would be a “Plan B", when I decided to chuck it all, but I didn’t realize that it would come so soon. Also, I’m not really an art supply junkie; I’ve just been saving for retirement! At least, that’s what I’ve been telling myself! By the way, the bezel in the above shot is still waiting for its resin layer. Somehow, I didn’t get around to adding it in the class.
Which pixie misplaced my beaded pendant (last Friday’s workshop)? This one was made ages ago, but has mysteriously gone missing, and is probably somewhere in my home. Surprise, surprise! Did the faeries spirit it away? Is it hiding under the dust bunnies? Or could it have fallen into an open stash bag, a box, or that infamous “safe place”? Sure, I was able to stitch up a couple of replacement samples, but the mystery remains unsolved! The pendant I started in the class has not been completed, so I expect you may be seeing it in some future update.
I find that I’m never quite as creative in a workshop (resin this time), as I am when I’m working solo. Teaching is less about experimenting, and more about describing a process, and then demonstrating techniques. I had planned to experiment with resin and a torch, but I think that needs to wait for another day. Probably not a good idea to try it, with impressionable students!!!! Confession time! Gulp! I did use the torch just a little! Enough to realize that I liked the effect, but not enough for show and tell! Could this be another class in the making? We played with collage, botanicals and Ice Resin (including various colourants), and I even demonstrated Iced Enamels, and Pebeo Fantasy Paints (Prisme). We had a blast! The shell is a borrowed idea (I learned it on one of my internet groups, but my apologies, because I don’t remember who the tip was from), and a way to use up those leftover bits of resin. Drip them into a seashell, and turn it into a decorative element. This is my first one, but this serendipitous multi-layered approach, seems promising! I’ll be sure to collect some more interesting bits, for future shells!
My “Silly Goose” doll is progressing nicely (I’ve fallen in love with the Czech Rizo beads), though she’s still missing her hair! The pile of Archeology beads will be turned into a bracelet, the filigree pieces are for a future mystery project, and I’ve included a workshop teaser shot! It’s all fine and good, but I do have some paperwork to complete, before settling into any extended beading sessions. Wish me luck!
Despite the heat, summer is a fabulous time for both exploring your creativity, and discovering new techniques, so don’t forget to check out the BeadFX classes! Now point me to a cool drink, because I feel the need to bead, as I find all that paperwork terribly distracting!!

Wednesday, June 29, 2016

Resin play!

Who says that everything needs to be serious? Playtime is an essential part of the creativity process. Some may think that it’s a little frivolous, but I believe that it’s the only way to go! I do so love to play!!
I spent a little time on the weekend, experimenting with Ice Resin, Iced Enamels, Iced Enamel Tints, Pebeo Prisme Fantasy paints, nail polish and Ranger Distress Paints. I made some clear resin cabochons earlier in the week, and all I needed to do was embellish them! After spotting a nail polish marbling video, on one of my Facebook groups (sorry, no link!), I decided to try it out on resin (float the nail polish in a bowl of water, and then dip-dunk the resin). Well, suffice to say that my nail polish selection is very thin, so the results were a little under whelming, but I did get some interesting colour on my nails (that’s what happens when you don’t wear gloves). But did that stop me? Not with a good selection of Iced Enamels and a heat gun! Note: not much of the nail polish remains in plain view, but next time I'll try harder!
Then on to Ranger Distress paints and another cabochon! I dabbed a couple of colours on the resin, waited for it to dry, then added Iced Enamels (using a wooden skewer, to apply the Iced Enamel Medium), for a dimensional effect! I liked the effect, and plan to try out some of my other acrylic paints, in the near future.
The third experiment, involved coating a couple of cabochons with Pebeo Fantasy Prisme paints. I quickly realized that the results were not going to be quite what I expected! Most of the paints slid off the rounded cabochons, and the only place the cellular effects showed (the effect these paints are known for), was in the puddles at the bottom of the cabochon. As these paints are solvent based (use these outside, or in a well ventilated room), I had to wait 72 hours for the paint to cure completely, but then I was able to simply cut off the blobs (of course I saved them). I haven’t added the next step yet, but the plan is to tart them up even further. Should I use drips of coloured resin, fire, an additional layer of Distress Paints, Iced Enamels or something else entirely? Who knows, but it will certainly be fun to figure it out! By the way, after I’m satisfied with (&/or finished embellishing) all three sets of experiments, I plan to brush on a thin, finishing coat of resin, to make them shine!
On another of my Facebook groups, someone had the brilliant idea to use up her leftover resin (the bit that’s not large enough to use, but too good to throw away) by dripping it into a seashell, to make a totally unique decoration. Mine isn’t finished yet, and I really wish that I had used either blue or green, but a girl’s got to start somewhere! The blue bead was made from clear resin and a tiny drip of one of Ranger’s new Iced Enamel tints (picked up at Bead & Button, by a very kind friend). Far from a perfect result, as the bead mold is very tiny, but I will keep on trying! The next photo is a classic fail, but that doesn't mean that I'm giving up!! I promise that I'll get it to work one of these days!!!
Encourage and nurture your inner child! Play, experiment and give yourself permission to make a few mistakes. Not all play is productive, but it’s definitely necessary for growth. Besides it’s fun, and we all need more fun in our lives!!

Wednesday, June 15, 2016

What's on my bead mat - June edition!

June has been an interesting month! The Canadian crew is back (exhausted) from the big Bead & Button show, but what have I been doing lately? Surprisingly, not all that much in the beading line! Other things kept distracting me, thus keeping me from my normal state of beaded bliss! Sigh!
I did work on a couple of potential BeadFX “Inspirations”, and added wire to a Freeform Peyote beaded bead. I’m not that happy with the wire or accent beads, so I expect to make a few changes and/or modifications in the future. After abandoning her for a couple of weeks, I’ve made another start on my “Silly Goose” doll. A little more stacked stitch around her neck/chest, joined by a couple of lines of Peyote (stitch) on her belly. These will probably morph into Freeform Peyote, as I’m itching to go a little crazy!!! The regular Peyote stitch sections are being used to stabilize the looser stitches (freeform right angle weave), and anchor the piece. Who knows where I will go from there?
You might also notice a silver bezel, with a turquoise coloured background. I originally started working on this piece, in one of my Mixed Media: Open Studio Evenings (the next one is this Thursday). The painted background was attached to the bezel, and then I glued on a rough, diagonal line of gold glass glitter. Well, I really didn’t like the results, so the piece didn’t progress any further. Last night, I decided to partially cover up the glitter, with a couple of layers of Iced Enamels (German Silver first, topped by a touch of Ivory). Better! Then I dipped the end of a bamboo skewer into the Iced Enamel Medium, and dotted spots onto the watery background (sometimes simple tools are the best). Then I sprinkled more German Silver, tapped it to get rid of the excess, applied heat (via my trusty heat gun), and my bubbles were born!!! But it still needed something! I rummaged my stash, to find the miniature starfish I made earlier in the year. Recipe – One itty-bitty starfish (borrowed from a friend), plus two-part epoxy silicone putty (to make a mold), plus polymer clay, plus an oven for curing the clay, equals a perfect focal piece! The colour is perfect, and only needed a little Gilders Paste for accent. What’s next, you say? Well, if I can wait that long, I will use this piece as a demo in my July Resin workshop. I plan to half-fill the bezel with clear resin, wait for it to cure (12 hours), and then add another shallow layer of resin, topped by the starfish (which will not be completely covered in resin).
Alas, the purple doll remains naked, and I haven’t even spared a thought for my pearls! Am I a bad doll momma and stash hoarder? In my defence, I seem to work in colour phases, and my current one is obviously green/blue. My prior one was purple, and I think I hit a purple “wall”! As for the pearls, I still have ideas roaming around my head, but nothing is really gelling right now. No more new pearls, until I use at least one string!!!
The message in this blog post is that you can’t spend all of your time on creativity. Sometimes other activities drift in to steal your time!! Deal with them, and then get right back on track! Better still (something I did not do, but wish I did), reward yourself with creativity breaks, to help you deal with all the stressors!

Wednesday, December 23, 2015

Reflections on an exploding stash!

Santa Baby, I've been a very bad girl this year!! I purchased tons of stuff, with absolutely no idea, what I was going to make! Sure, I whipped up some class samples, and made an Inspiration or two, but did I really need all of those pearls? I ask you, would you?
Then, let's chat about the paint I purchased. Yes, I absolutely needed the Pebeo Fantasy paints, Adirondack, Alcohol Inks, Ice Resin, Iced Enamels, Gilders Paste, Mica Powders, and Spectrum Noir markers, for workshops I was teaching, but did I need so darned many of them? Not to mention seed beads, shaped beads, stones, buttons, bezels, rusty objects, found items, and perhaps even a cabochon or two. Should I mention the findings, threads and tools? It doesn't matter, because they make me happy, and if that means that Santa is not going to slide down the chimney this year, then so be it!
Now, how about talking about the stash from my pre-beading life, when I fancied myself a fibre artist? I own piles, and piles of thread, paint, paper, embroidery floss, and even a bunch of yarn (despite the fact, that I don't knit). It's not like it suddenly disappears, in a puff of smoke, when I head off in a new direction! It's still there, and it's clogging up my studio, and if the truth be told, my living and dining room, and storage area. When will I ever learn? I'd be embarrassed to show a photo of said studio, so I won't....but believe me, you're not missing anything! Sign me up for hoarders anonymous!
So, in the interest of full disclosure, I've been participating in an international paper swap, for a couple of years. Do I need more paper? No, of course not (except as collage fodder for my altered dominos), but I still signed up for 2016 (if anyone is interested, it's www.paperswap.com). It's a fun way to add some unusual papers to your stash, and meet a bunch of lovely people, along the way. Should I mention the fact, that I also monoprint my own papers (mainly for collage, paper beads, and swaps), via a wonderful tool, called the Gelli Arts, Gelli Printing Plate? You'll need to look them up, because they're not sold in the store (but I do use the printed papers, in several of my workshops). There are tons of YouTube videos on the subject, and it's just waaay too much fun!
I'm not really one to make resolutions, but if I were, I'd vow to make a pile of pearl pieces, and perhaps a few mixed media projects, over the holidays. In addition, I would dust off my neglected sewing machine, and give my beads, a little dose of fibre, for good measure! You see, I love it all, and it saddens me, when my older treasures are neglected. But seriously, I really do need to purge and organize my stash!!!
It's an exciting time of the year, despite the fact that Toronto is having unseasonably mild temperatures (by contrast, the above photo was taking after the ice storm, on December 22nd, 2013). There is, no chance of a white Christmas, but that's not stopping us, from celebrating the spirit of the season. So with that, I'll wish you all a very Merry Christmas, and to those that do not celebrate, a happy and healthy holiday of your choice. Enjoy your time with family and friends, and if you get a chance, try to relax, with a few beads! You've earned it!

Wednesday, December 02, 2015

Inked, brushed, heated and altered!

Dwyn presented me with a bit of a challenge the other day, when she handed me a string of metal, brushed silver beads, and asked me to work my "magic" on them. Not being one to shy away from such a challenge I decided that it was time to play! As I didn't want to wreck my gifted beads, I rooted around in my stash, until I found a couple of older ones, to mess about with. I decided that I liked the direction I was taking, so jumped right in, and started altering the challenge beads. Hmmm, should I use Baroque Arts Gilders Paste, Vintag Patinas, or my trusty, Adirondack Alcohol Inks? Well, the AI's won, mainly because they gave the beads such a cool, distressed, look!
I need to warn you, that the process of working with Alcohol Inks is downright messy! I highly recommend protecting your work surface (parchment paper is good), and also wearing gloves, unless you like scrubbing your hands raw. Ask me how I know? I dabbed a few drops of the Pitch Black and Eggplant AI's on my blending tool (another Adirondack product), pounced it on all bead surfaces, and then waited for the beads to dry. The bead holes were way too small, for me to safely suspend the beads on a toothpick, so I had to resort to my Amaco, Bead Piercing Pins (originally intended for polymer clay). You could also try wire, or long embroidery needles (beading ones are too fine).
I decided to break out one of Susan Lenart Kazmer's, Iced Enamels, in my favourite colour of German Silver, brushed on the Iced Enamels Medium, sprinkled the powder, and then tapped off any excess. Now, what the heck was I going to do? I knew from my earlier experiments, that I needed to suspend and cage the beads, to prevent them from moving around too much, so I piled up some ceramic tiles (in a U formation), arranged them on my heatproof surface, and then suspended the beads (supported by the bead piercing pins) between the tiles. Now the fun begins! Hold your heat tool (embossing gun), an inch or so above the surface of the bead, and wait for the Iced Enamels powder to melt and bubble. Use a toothpick, or wood handled tweezers, to carefully rotate the bead, until all surfaces are heated. Warning, the beads will spin around in the heat, and they are very hot, so you must wait for them to cool!!! But wait!! There's still more to be done, but not today.....in the next few days, I'll need to give the beads a quick UV spray (Protect Your Memories II, or Krylon UV spray are good ones), let it dry thoroughly, and then carefully brush on a thin, protective coat of Ice Resin (again, carefully suspending the beads on the pins). I may give the pins, a quick dip in Vaseline, to make sure the resin doesn't stick. In reality, I probably won't coat the ends with resin, because I certainly don't want the beads to get permanently stuck on the pins! Eeeek!!!
BeadFX carries a good supply of the metal, brushed silver beads, in many shapes and sizes. A little birdie told me that even more are coming in the near future! They also stock Ice Resin, Iced Enamels, Iced Enamels Medium, gloves and wood handled tweezers. For safety sake, you should always work in a well ventilated area, and for those with chemical sensitivity issues, a respirator, gloves and eye protection are a must!! I absolutely love the results, and plan to alter many more beads (and other stuff, of course), in the future! How about you? By the way, I have necklace plans for these beads, so keep tuned! You'll need to be patient though, because I doubt that I'll be able to pull it all together, before the holidays.....

Wednesday, November 18, 2015

Are you ready for a shot of colour?

The leaves are almost gone, and although it's still weirdly mild in Toronto (for November), the clock is ticking, and winter is just around the corner! In the corporate world, my go-to wardrobe colours, were black, grey and navy, but now with my beady, mixed media life, I find myself constantly reaching for colour (well acually, I still reach for black, but it's a sickness)! No, I'm not going to abandon my wardrobe completely! Replacing everything would be much too costly, but there's always the wild and wacky world of accessories!!! Bracelets, necklaces, rings, belts, hats, gloves and scarves, oh my....and don't forget, they can all be embellished with beads.
As a mixed media artist, my colour requirements, go way beyond accessories! I'm addicted to anything colourful (except in my clothing). Paints, powders, markers, beads, buttons, threads, leather, paper, pigments, waxes, feathers and fibre, are just some of the ways I've learned to cope with winter! BeadFX cannot possibly carry everything I need to buy (after all, they are a bead store), but they do have a nice selection of products, to enhance my arting experience. We'll explore, just a few!
Gilders Paste - "is a wax/resin product with a high concentration of pigment, for adding colour to metal, wood, ceramic, resin and many other items. It behaves much like a wax or a polish. Apply with a finger or a cloth, let dry - buff." I've used Gilders Paste on the edges of my Altered Dominios, paper collage/beads, metal (boxes and charms), shells and stone. It's wonderful stuff, and really, very easy to use!
MetalFX - Mica Powder - is BeadFX's own line of metallic powders. While originally intended for colouring epoxy clay, it's also very effective, when used with Ice Resin and polymer clay. A little goes a long way! You could also shine up your handmade cards, or paper collage, by brushing on a light coat. Also, how about those tired holiday ornaments? Could they use a little more sparkle (just remember to spray them with a light fixative, for protection)? Okay, I know.....it's not glitter....but sometimes you need to be a little more subtle. I wonder what would happen if I tried dusting it on metal? I'd need to spray on some type of fixative, but I bet it would work! I'll file that idea, in my "later" folder.....
Iced Enamels - "by Susan Lenart Kazmer, are a unique, custom-formulated, proprietary, Cold Enameling system for permanent adhesion of colour on metal. The combination of enameling medium, powders, and Ice Resin as a clear protective top coat, produce a rainbow of durable, brilliant colour on metal that is easy to do and lasts a lifetime." If you like the look of glass enamels, but are not ready to commit to the time, effort and expense involved, this is an interesting alternative. I started out using it on metal bezels and blanks, and then graduated to shells, watercolour paper (made into bracelets) and paper beads. I'm certainly not finished exploring this product yet, so you can expect more updates and workshops in the future......................................................................................................................................................................
Stones, crystals, beads, rattail (cording), soutache, feathers, leather, threads and more! Why don't you drop on by? BeadFX has walls of colour (both on-site and on-line), to seduce you out of the winter blues!

Wednesday, September 23, 2015

A Bevy of Bezels

Today, we're going to chat about the wonderful world of metal bezels!  As you can see from the photographs, BeadFX has quite an extensive collection, which is great for aspiring mixed media artists (all that metallic bounty in one place)!  I'll let you in on a secret though; you don't really need to know anything about mixed media, to use these remarkable products. Bezels are versatile, and suitable for an endless variety of uses. We even carry the popular Susan Lenart Kazmer, Hobnail bezels and the Klick line of interchangeable components.


Believe it or not, I haven't tried everything yet, but imagine your bezels, filled with any of the following: collaged paper, photographs, downloaded images, pencil sketches, minature landscapes, old love letters, a child's art, postage stamps, paper napkins, ephemera, text, commercial and hand painted papers, eggshells, broken china, sea glass, fibre, dried flowers, charms, beads, glitter, shells, and even more! Didn't think of that, did you?  If that's not enough, you could also fill them with either Crystal Clay or Apoxie Sculpt, and then embed Swarovski crystals, old keys, watch parts, game pieces, or other exciting stuff, and wait for it to dry! Don't you just hate, waiting for things to dry?

But what about Polymer Clay (PC), you say?  I'm sure that someone out there, has been purchasing bezels, and filling them with all types of PC.  They're metal, aren't they?   So why couldn't you bake them at low temperatures?  I'm not telling you to do this, but in the spirit of experimentation, I just might!  The official disclaimer is.....do this at your own risk, as I don't know how the coatings and finishes will react.......but I'm a Mixed Media Artist, so serendipity is my friend!  Besides, I like the distressed look!!!

You've filled your bezel, so now what do you do?  More choices! You could top it up with Ice Resin, after adding a lovely edging of Iced Enamels, and perhaps some of their Inclusions.  How about trying one of our glass tiles (but not all will fit)? You wouldn't need more than "a little spit and polish", for the various clays.....unless you'd like to add a dab of Renaissance Wax.

A few of my images to tempt you!


When using paper products, with your resin, remember to seal carefully.   Mod Podge or white glue is recommended (as are other types of collage or decoupage mediums), but don't forget to seal the front, back and edges, to avoid staining.  Botanicals should also be sealed!  Mix the resin slowly and carefully (instructions on package), wait five minutes, and then add to the bezel, a little at a time, to avoid air bubbles. Pop any that you see, and don't forget to cover your pieces while they dry.....no dust motes, or cat hair allowed!!! If you're not yet confident enough, to do this on your own, or just like the structure of a hands-on class, check out my November Resin workshop.   It's not on the schedule yet, but it's definitely in the works (and you could probably get yourself on a waiting list). Keep tuned!

Anne Marie