Well, I couldn’t let Dwyn have all the fun, could I? I was the second person in the store, to nab a container of
Create Recklessly, Artist’s Concrete, and I need to confess, that I’ve already used up half of my supply. This stuff is seriously fun to work with, and I’m just getting started!
Many of you know that I love to experiment, so instead of showing you my first efforts, I’ll show you a few of my final ones (okay, I’ll show you all of them, but I like these the best). The idea is not my own, as I did spot a YouTube video, that showcased this technique. All you do is dump some glass glitter (the coarser the better) in the bottom of a mold, and then pour the concrete over top. The concrete flows around, but doesn’t seep all the way through the pile of glitter. When the concrete is dry (wait for at least an hour), take it out of the mold, and then shake off any excess glitter, for a fabulous hollow, faux druzy effect!! It’s better to use a clean mold, as the concrete will absorb any dust, dirt, or leftover pigments.


I've heard that you could use Alcohol Inks (AI) to colour the concrete, but that you should be careful with the quantities used (of course, they didn’t provide the recipe!). I erred on the side of caution, and only used four drops of colour. Either the colour I chose (Adirondack “Pool”) wasn’t strong enough, or I should have used more, as the AI only lightly tinted the concrete (the second photo in the post is the one with the AI). However, I’m not too worried, as there’s plenty of time for further experiments. I didn't use any pigments with the heart mold, but don't you just love it? Even better, it was a freebie, sent with an on-line purchase.


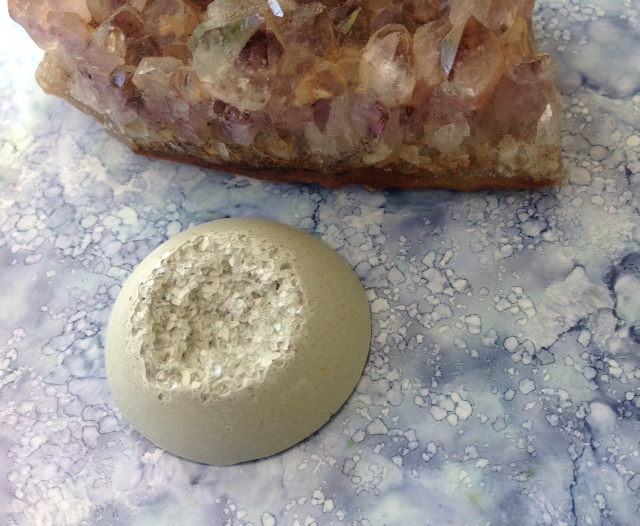
By this time, I was getting tired of glitter (not really, but for the sake of science, I had to try something else), so I tried mica flakes, and then some tiny rocks (that I had purchased for my October, Bead Embroidered Pendant class). I’m not that thrilled with the blue mica, but I absolutely love the rocks!! The cabochon reminds me of a dragon’s egg, and now I need to buy a teeny, little dragon, to see if I can play mommy!
Next I dusted mica powders in the bottom of a couple of molds, and then poured in the concrete. The coverage on the face cabochon turned out a little spotty, but I do love the starfish, seashells and button! The white shell is natural, and is from the first batch of concrete that I poured.
Next up, open backed bezels! I dug into my stash (for a couple of them) and added some packing tape to the backs (making sure that I burnished it well, to ensure complete contact with the metal). These bezels are pretty thin, so I carefully dripped in a little concrete (with a toothpick), spread it out to the edges, then lightly dusted on a bit of leftover glass glitter. I rather like the effect, don’t you?

Back to experimenting! Rochelle had gifted me some rusty road kill (random bits, picked up at the side of the road), and I thought that one of the larger washers would be perfect in the bezel. I added it right after the pour, and to my surprise (silly me!), it started to sink!!!! Oh no, what should I do? Of course, I added another smaller washer, and this time, right on top of the first. Perhaps not a perfect solution, because the proportions are off, but I haven’t given up on the piece! I still have the option to either glue, or draw something on the concrete. It's interesting to note, that the rust has started leaching out into the concrete. I'm not really surprised, but it's something I hadn't considered.
These faces illustrate the fabulous detail you can get with this product. I used a bit of the
plum pigment (Create Recklessly) in one of them, but feel that I should have actually added more. The bumpy, organic piece is from a mold I made from a Lychee Nut shell, that Pam gave me. Now for the downside - An imperfect mold = an imperfect piece, so don’t be surprised if some of your pieces don’t come out perfectly. Just remember to throw out those molds, and start again!
As you can see, I’m quite excited by this product. My ideas seem to multiply like rabbits, and I plan to continue to explore my concrete ideas, in a concrete sense! Will there be an Artist's Concrete workshop in the future? Keep tuned, but first I feel the need to play!