Click here to visit ...

Tuesday, March 15, 2016

Getting to Know...Genevieve Habib


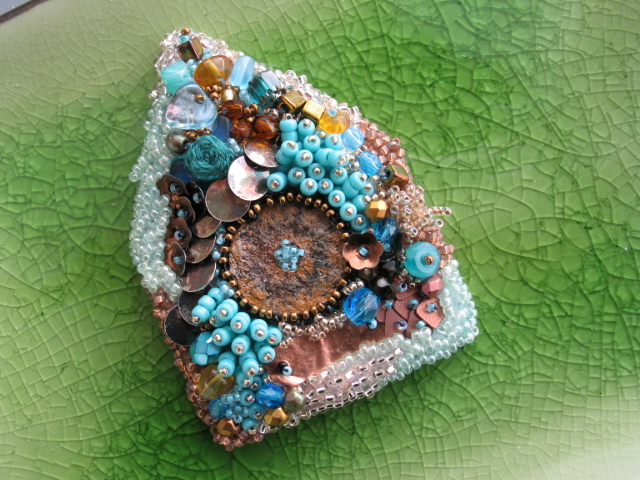
You haven't met Genevieve Habib as yet, so let me introduce you to our newest instructor! Genevieve is a bead artist living in the Niagara Region and has an incredible passion for beading. As an instructor, she is bringing us her enthusiasm for the Hubble stitch!

Genevieve's background was filled with creativity and skills passed to her by family members. Eventually, after a career in teaching theatrical costuming in college and high schools, she was ready for retirement.

"I rediscovered a bag of beads rummaging through my costume drawers while cleaning out stuff to make room for retirement and files and filing cabinet. I had bought the bag of black beads at a flea market and air show somewhere in New York for $20. When I opened and assembled the contents it was a beautiful 1800s, or earlier, black jet beaded collar," explains Genevieve. "I decided to find out how to fix it. Browsing a magazine I saw a beading class being offered and I thought, 'Oh, I haven’t done that since Grandma sat me in the garden.' So I signed up and instantly got addicted.

 "I fell in love with the creation process. Suddenly my brain was sparked. I gave control over to the string, beads and energy. I saw little glimpses of beads in rows or shapes in my head and I tried to make what was I was seeing. I didn’t have a drawing; I just learned a stitch like herringbone and went home and tried to follow what I saw. It didn’t look like the pieces in class I was supposed to be making. No matter what jewellery the teacher showed me that I picked to make, it never ended up looking the same. The piece I worked on morphed on me in process. I let go, I gave control to my inner instinct and I kept working on my first piece for 200 hours. My husband thought I was weird because I was making stuff he’d never seen. I had never seen. My bead count was already into the thousands. I was very shy to bring my piece to class for show and tell but I wanted the credit," says Genevieve.

"Well, I was not prepared for the reaction. My teacher, a wise and very knowledgeable beader, looked me square in the eyes and said, 'I didn’t know why you were taking the course. Now I know. You want to make Art.' And suddenly it hit me. That’s exactly the gift the universe has given me in the last quarter of my life. Beading feeds my soul. It re-energizes me. It gives me solace and comfort and focus for all my obsessive behaviours. It’s contemplative and meditative and creative. It’s social and constructive and I meet with many like-minded women and I have a great opportunity to share and teach and pass on the arts and crafts I have learned and enjoyed for so many years."

 "Nature and natural processes inspire me," says Genevieve. "Good people and good action inspires me. Kindness and appreciation inspire me. Hope inspires me. Creating something out of a little bits of glass and colour inspire me. Once, I saw a stand of rushes by the shore on a hike one summer on the Bruce Trail. At the Cellular Level is a piece to be imagined as the inside of a bull rush cut in half and viewed under a microscope. I imagined the life-giving nectar moving by osmosis through the chambers and woody cells, to the woven seed pod, to a quartz crystal wand entangled in the roots of the bull-rush. Life force moving life force for millennia. Inspiration is a naturally growing thing we can cultivate. It is everywhere."

Genevieve's advice to others who create? "Go for it. Learn everything you can about any interest you have whether it’s beading or race car driving. Don’t sit there blank. Trust your inner passion to guide you. Make friends. Eat, drink, share, love. Find out what your creative voice is telling you and do it. Have no fear treading into the creative realm. THE FORCE IS WITH YOU!, to quote Star Wars.

Upcoming classes with Genevieve Habib:

Sunday, May 8
Hubble Right Along: Hubble Bracelet
12:00 - 3:00pm

More classes will be available soon!

Monday, March 14, 2016

Riveting made easy

I taught a leather cuff bracelet project this weekend at Beadfx that featured rivets as a main structural and design component. And riveting has never been easier! So I thought I'd share how easy it is to use Metal Complex compression rivets on today's blog.

Here's a picture of the cuff -- well, several versions of it:


The compression rivets I used have rounded caps and come in two pieces that look the same on the top and bottom, except that one cap is slightly longer than the other so they fit together snugly. There are various sizes too. The 6 x 6 mm pictured below have the same size domed caps on each part of the rivet. Others can be 6 x 7 mm so one cap is larger than the other. 


They can be set using just a hammer, but that method tends to flatten the lovely domed cap of the rivet. But of course, there is a handy tool you can use to set the rivets and keep the domed caps nice and rounded.  

The depressions in the anvil plate and in the end of the striker ensure both caps on your compression rivet stay nicely domed. All of these rivets, in silver and gold tone metal, as well as snap closures and their setting tool, can be found on the Beadfx.com site and in store. 

You will need to make a small investment in a leather hole punch: there are several kinds available, from handheld squeeze-type pliers to metal tubes that you strike with a hammer. 

Once you have a couple of special tools and a bag of rivets, find some new or recycled leather and get to work making great wearable jewellery that's comfortable, stylish and fun.  

Credit for the original bracelet design goes to Brenda Schweder. This version is my riff on her original design. The clasp and joining components are created on the Now That's a Jig! You also might notice I added eyelets to one version. They are easy to set with the right tools too. 


Sunday, March 13, 2016

InspirationFX: Golden Light


Golden Light
 
by: Dwyn Tomlinson

These earrings are lighter than air, lighter than light, lighter than the kiss of a golden sunrise, which is what they most resemble!

Using these bead frame settings, without any backs, is the secret to making these big, statement earrings that are comfy to wear. The colour combinations are pretty much limitless - so make several pairs!

To assemble:

Hold the rivoli in the bead frame - with the edge of the stone inside the channel, and gently squeeze the frame shut at the base of the loop. Micro-tip pliers or needle-nose pliers work. If you have a pair of DULL cutters that will not cut metal any more - those are also ideal for getting in close and squeezing the link shut.

I found the little link with the chaton in it to be a tighter fit. I had to open it a little to get the stone in, and it doesn't close up quite as much. But trust me, it is still secure and no one will notice. If 
they are that close to you - they don't care about your earrings! Join the links with small jumprings, and add the earwires.

Easy peasy!


Components

Go to our components list for this project and to buy what you need!
Need some help with some of the techniques? Check our tips page.

Friday, March 11, 2016

InspirationFX: Dog Tooth Double Ladder Bracelet


Dog Tooth Double Ladder Bracelet

by: Bonnie Cottingham

When BeadFX got the stone buttons I knew I could use them for ladder stitch bracelets.
Now it was a search for the right beads!

This week, new stone beads came in and my search was complete. The only trouble I had was deciding which size and shape to use.

Making ladder stitch bracelets there are quite a few techniques for the ladder stitch bracelets
Many can be found on YouTube or through your Pinterest page.

Each bracelets shown uses a different technique to make it.

The double- wrap natural bracelet uses two strands of C-Lon cord going into each bead in the opposite directions.

The single- wrap black leather bracelet uses a doubled over strand of Fireline.

I used a tray to help  make the bracelets. I find it easier that using a clip board. The side walls of the tray lift the project off the surface and it makes it easier to reach under and guide the C-Lon or thread around the strands of leather.

I also used a scrap piece of rattail to put tension on the leather to keep it straight. The rattail is easy to use and very easy to untie.


Components

Go to our components list for this project and to buy what you need!
Need some help with some of the techniques? Check our tips page.

How Much Difference Does a Bead Size Make?

Actually, quite a bit!

As many of you know, I love seed beads and working with these small gems of colour. As we get new sizes and shapes of seed beads, Marg often gives me some and says, "See what you can do with these!"

This time it was the Mini-Duo's turn to be played and experimented with. According to the manufacturer, the MiniDuo has the same overall shape as the SuperDuo only smaller. They don't look that much different - not enough to make a huge difference - so I thought. Think again!

Here is an example of the size comparison using existing patterns from The BeadSmith/ Matubo for beaded beads made specifically for SuperDuos. I also did the same beaded beads but sized them down to accommodate the MiniDuos. Quite a difference!

The original pattern for the smallest/bottom bead called for SuperDuos and Matubo 7/0 beads around an 8mm core bead. Using the MiniDuos, I substituted Toho 8/0 (for the Matubo 7/0) beads around a 6mm core bead. So cute!

Likewise, for medium/middle bead, I used the same combination of beads but the MiniDuos/Toho 8/0 beads went around an 8mm bead instead of a 12mm bead used with the SuperDuos/Matubo 7/0s. For the large bead, I added a Matubo 7/0 with the MiniDuos/Toho 8/0s instead of a 4mm Druk with the SuperDuos/Matubo 7/0s. Not bad, but a little large; next time I might substitute a 2mm firepolish bead instead.

Overall, the MiniDuo combination measured 2" top to bottom as shown and would make exquisite earrings. The SuperDuo combination measured about 2 1/2" top to bottom and would make a wonderful pendant.

Now, what about Delica beads and how much difference is there between size 11/0 (which is what most beaders use) and size 10/0? Again, quite a bit!

Here is a photo of my Caldera Christmas Tree. The original tree (on the left) is done using size 11/0 Delica beads. Beside it is the same pattern (same number of beads and rows) using size 10/0 Delica beads.

The moral of this story? Play with your beads! What can be done one size of beads can be accomplished using another size. Yes, you will need to substitute some beads with another, but you will be amazed at what you will come up with!

By the way - I'll be teaching how to do the small beaded bead with SuperDuos as a pair of earrings in the Tuesday Taster classes on Tuesday, April 19. I'll also be teaching the Caldera Christmas Tree on Sunday, May 29. Check out the classes on our website!

Thursday, March 10, 2016

Let the Madness Begin!

db0022lc Delicas - 11/0 Japanese Cylinders - Cut - Metallic Light Bronze (7.5 g)
s48137 Czech Seedbeads - 2 Hole MiniDuos - Pastel OlivineHere it is - the sale that needs no introduction - our annual March Madness thank-you-to-you for being so awesome! Because our customers rock! and bead! and roll! and stitch! and wire! and hammer! and ... just everything.
20% off everything* in the store. (*Some select items excluded. Because they are already such a fabulous deal. But some stuff is more than 20% off. Whoa nelly there are some good deals! Like these 70%!-off items!)

And here's something special - registered businesses get an extra 5% off during the sale over their regular discount!

OK - sale rules: The exceptions are:
  • No discounts on class fees
  • No discount on gift certificates. 
  • No discounts on Studio time/lampwork cards, lampwork tools, glass and lampwork supplies.  
  • No discounts on special order merchandise, or special bulk orders.  
  • The discount cannot be combined with Art Clay instructor discounts
  • Some items ARE excluded from this sale. Some metal clay items, some tools, and previously discounted items, and a few other items which are already at wholesale prices. You will be able to see online if an item is discounted. Remember - you always get the best possible discount - so if something has been discounted more than the sale discount - you will get the greater of the two discounts.
Things tend to get a little crazy around here during a sale, so we have a few rules to make it go more smoothly.

  • No frequent beader points awarded on sale or discounted merchandise 
  • No frequent beader points will be redeemed during the sale 
  • The discount is NOT retroactive and does not apply to previously purchased merchandise.  
  • No special orders or special bulk orders will be accepted at the sale prices. 
  • No Rain Cheques. No backorders. No holds. When it's gone, it's gone. The early bird gets the beads. Online orders will be picked in the order in which we receive them.
  • Sale ends Midnight, Wednesday, March 23 (Toronto time) (Well - in-store it ends at closing time - because we won't make the staff stay until midnight.). If you haven't checked out by then - the items in your shopping cart will revert to regular prices. (And we can't change that - sorry.)  
     
  • If you are placing a phone or fax order, please ensure that you have the sku/product numbers ready, as well as the description. Same goes for email orders - as we'd prefer to not have our order picking staff have too many nervous breakdowns. It's always painful to find them hiding in the studio, clutching a blankie and mumbling about "no more beads."
     
  • We will be VERY busy during the sale. Having this information ready when processing your order, will help us get your order out the door in a reasonable time frame.

We do anticipate that shipping will most likely be delayed by a day or two from our usual timeframe.
So click on a link and go crazy!

Happy Shopping!

Wednesday, March 09, 2016

A budding fascination!

What is Assemblage Jewellery? I'm jumping out on a limb here, but my definition would be jewellery that is made out of recycled &/or repurposed elements (and perhaps a few new ones). Raid Granny's jewellery box, pull out your Mom's old earrings, and then visit the local thrift store for some interesting bits! After that, use a combination of glue, stringing, wirework, and perhaps rivets, to combine the various elements into a unique piece of jewellery. Have I actually done this? Well no, but it's certainly something that interests me!
It's my belief that old is just as interesting as new, and well crafted is certainly worthy of a second life! With my ongoing love of recycling, I already see elements of assemblage in my work (mine normally involves either bead embroidery or resin), but I'd like to take that further! How would someone go about it, you say? Of course, trolling the Internet always plays a starring role! I try not to fall down the Pinterest rabbit hole too often, but I do confess to a serious blog addiction! In reality I haven't been researching this subject for long; so do expect more posts in the future. The first photos are from a site called Sparrow Salvage. Google Sparrow Salvage photos and you'll notice wonderful photography, and a very romantic take on assemblage. They seem to use just about everything in their work including wire, feathers, romantic fabric and lace! All three photos (below) are courtesy of the above site.
Here's another take on it, from a site called bsuesboutique. The jewellery on this site is a little more polished, and the owner shares a lot of instructional videos (Google bsuesboutique photos & bsuesboutique videos). Not all of the elements are vintage, but the techniques are transferrable, and it's a good resource for tips to pulling these pieces together. E6000 is the glue recommended by both sites. You could also combine some of your older pieces, with the vintage looking elements (like Vintag brass) that BeadFX carries, then distress them with a coat of Gilders's Paste. Now take a look at this spectacular necklace from bsuesboutique!
My brain is percolating along, dreaming up all sorts of interesting bits and pieces for future workshops and blog posts. I'll start with simple experiments, and then focus on more complicated and fascinating work. Is anyone tempted to join me? If so, I need photos.......please!!!