Last week, I showed you how to wire up a briolette or pear drop for hanging.
Then someone asked about wrapping the wire down around the bead for a sort of bead cap look.
Ok - we can do that.
One approach is to use a thinner wire, 22 gauge or less, and just go crazy - u
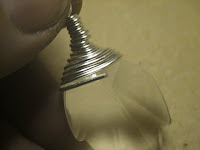
 se a long piece of wire and wrap down and over the bead, and then even back up to the loop again and finish there. It gives you a funky and highly textured look - which may work well in the context of what you are making. See the green leaf vs the clear leaf in the first picture. (BTW - it looks pretty cool with square wire too.)
But if you'd like to attempt to make that a little neater and more controlled - try this method.
 Slide the bead onto the wire and fold the wire up into a tight U shape. I'm using 20 gauge wire here. I cut about 8 inches, and I used pretty much all of it.
You want the wires to lay flat, side by side. If the wire is very soft, you can just do this with your fingers, otherwise, use pliers to get them lined up.

Holding the wire with the round nose pliers, and leaving the short tail in place, start a wrapped loop.
See a recap of wrapped loops here, and a video here.

Bend the long end of the wire at a 90 degree angle.

Reposition the pliers.

Wrap the wire around the pliers.

The short tail should still be sticking up through the loop. Don't cut it off. Yet.

Start wrapping your wire down towards the bead.

Make sure each successive wrap lays neatly and tightly next to the previous one.
You will see that you are wrapping onto a triangular base, as opposed to a straight line - that tapers all the way down to the bead.

This will give you a nicer taper, as opposed to wrapping down a straight pole and then trying to flare out around the bead.

When you get to the bead, simply continue to wrap, wrapping down onto the bead.
Continue to ensure the wraps lay neatly next to each other.

I usually carry on until I run out of wire. The best place to end is in the middle of one of the flat sides - which gives you the best chance to have the wire lay down flat and out of the way.

In this case - the end of the wire was too close to the side,
 so I trimmed it off a little.
To keep it flat - squeeze the wire down against the bead using your pliers, squeezing on each side of the bead. Do not press too hard on the bead - especially the crystal beads, as you may crack them - but you will be putting some pressure on the bead and using it to form the wire.

If you are using a fine (thin) wire - you may find the end just naturally slides up and under the coil, but this wire is too thick for that to happen.

For your final step - go in and trim out that wire tail out from the loop. Use sharp flush cutters and trim carefully so as not to cut the loop.
 The end result is fairly tidy and neat looking.
Cheers!
Thank you SO MUCH!! That is a lot of work that you went to, but I do appreciate it. Almost like having you watching over my shoulder, teacher (G).
ReplyDeleteMy Michaels "teacher" had a very awkward way of doing loops, so I am now doing them your way.
I will try out this bead cap style as well.
Thanks again.....HF
this tutorial & accompanying photos are so easy to follow. This is great :)Thank you for responding to my request.
ReplyDelete